Best iPhone 17 Camera Settings You Didn’t Knew About [Full Guide]
Well-adjusted iPhone 17 camera settings can dramatically improve the quality of your photos and videos. Apple’s newest camera system includes powerful features like:
- Smart HDR
- ProRAW
- 48MP capture
- advanced computational photography.
However, many of these tools are not optimized by default.
In this guide, you will learn the most useful camera settings to adjust on your iPhone 17 for sharper photos, better lighting, and more professional results. If you want to master more iPhone photography features, you may also find our guide on using advanced camera features in iOS helpful.
What Are the Best iPhone 17 Camera Settings?
The iPhone 17 lineup includes a powerful 48MP camera system, improved HDR processing, and enhanced image stabilization. These features rely on Apple’s computational photography engine to combine multiple exposures and produce balanced images.
Adjusting the right camera settings allows you to capture more detail, control lighting, and avoid overly processed photos. The following settings help you get the most out of your iPhone 17 camera, whether you shoot portraits, landscapes, or video.
1. Turn On Smart HDR
Smart HDR improves dynamic range by balancing highlights, shadows, and contrast in every shot. This helps when photographing scenes with both bright and dark areas.
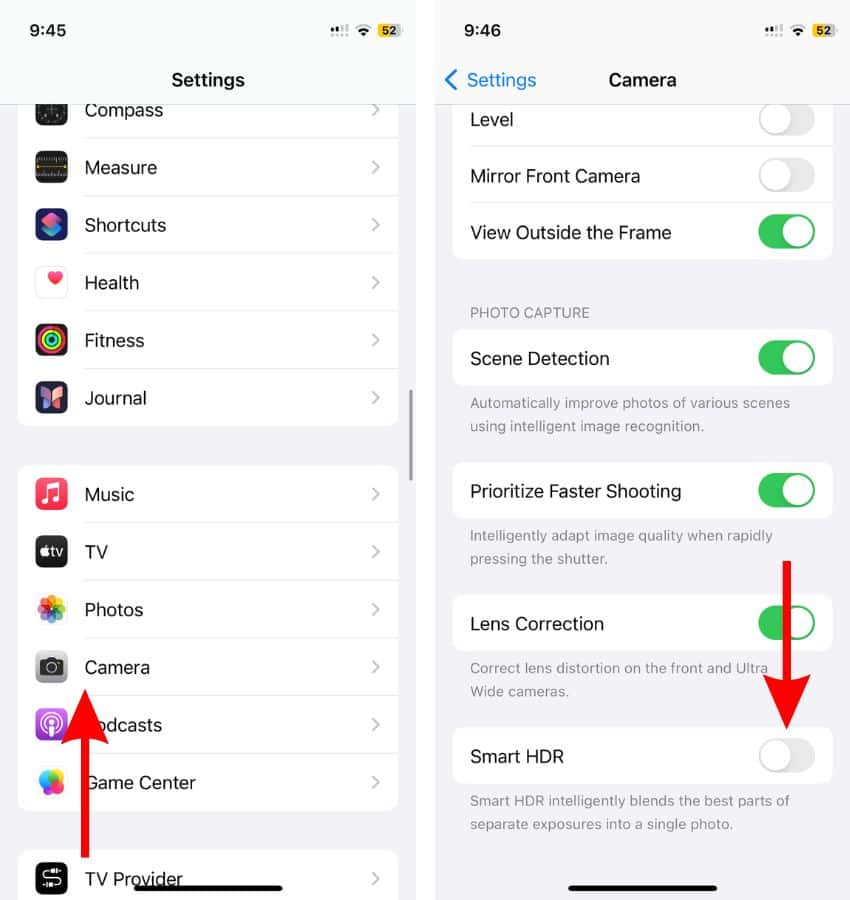
- Open Settings.
- Tap Camera.
- Tap Smart HDR.
- Turn Smart HDR on.
Smart HDR analyzes several frames and merges them into a single photo with balanced colors and lighting. It is especially helpful for outdoor scenes, sunsets, and high-contrast environments.
2. Use Apple ProRAW for Maximum Image Detail
Apple ProRAW captures photos with minimal compression and preserves more data for editing. This is useful if you plan to adjust color, shadows, or exposure later.
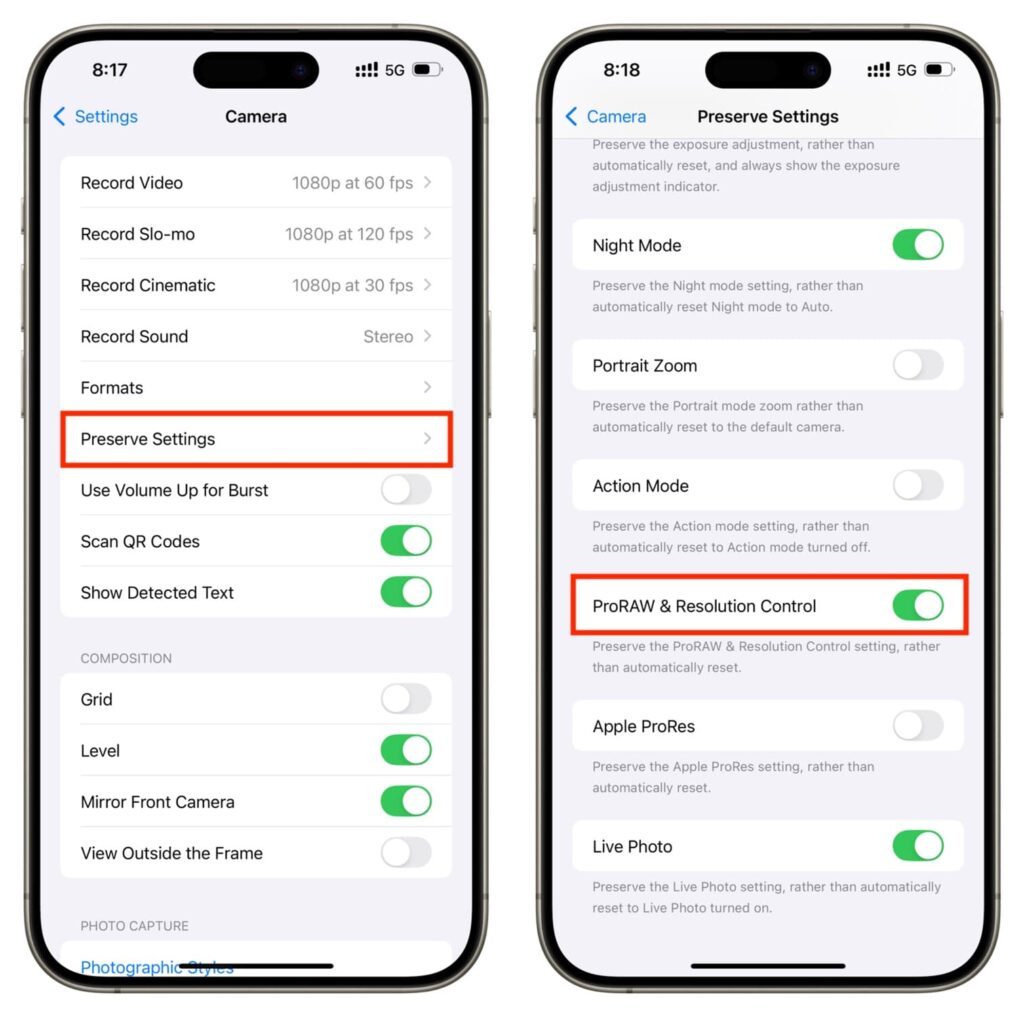
- Open Settings.
- Tap Camera.
- Tap Formats.
- Enable Apple ProRAW.
- Select 48MP resolution.
After enabling ProRAW, open the Camera app and tap RAW before taking a photo.
ProRAW files contain much more image information than standard HEIF images. This gives you more control when editing photos inside apps like Photos, Lightroom, or other image editing tools.
If you plan to edit images later, it also helps to understand how iPhone images are stored and managed. Our guide on reducing the size of iPhone pictures explains how to manage storage when working with high-resolution photos.
3. Enable 48MP Resolution Mode
The iPhone 17 camera sensor can capture extremely detailed images at 48 megapixels. By default, the device may save photos at a lower resolution to reduce file size.
THis is how you enable easily the 48MP resolution mode on iPhone 17:
- Open Settings.
Start by unlocking your device and locating the Settings app on your home screen or in the App Library. Tap on it to access the main configuration options for your iPhone.
- Tap Camera.
Inside the Settings menu, scroll until you find the Camera section. This area contains all the options related to how your iPhone captures photos and videos.
- Tap Formats.
Within the Camera settings, select Formats. This section controls how photos are saved and what resolution and quality settings are available for your camera.
- Select Photo Mode.
In the Formats menu, locate and tap Photo Mode. This option allows you to choose the default resolution used when taking standard photos with your iPhone camera.
- Choose 48MP HEIF Max.
Finally, select 48MP HEIF Max from the available options. This setting enables your iPhone to capture photos in full 48-megapixel resolution while using the efficient HEIF format.
Higher resolution photos are especially useful when photographing landscapes, architecture, or scenes that may require cropping later.
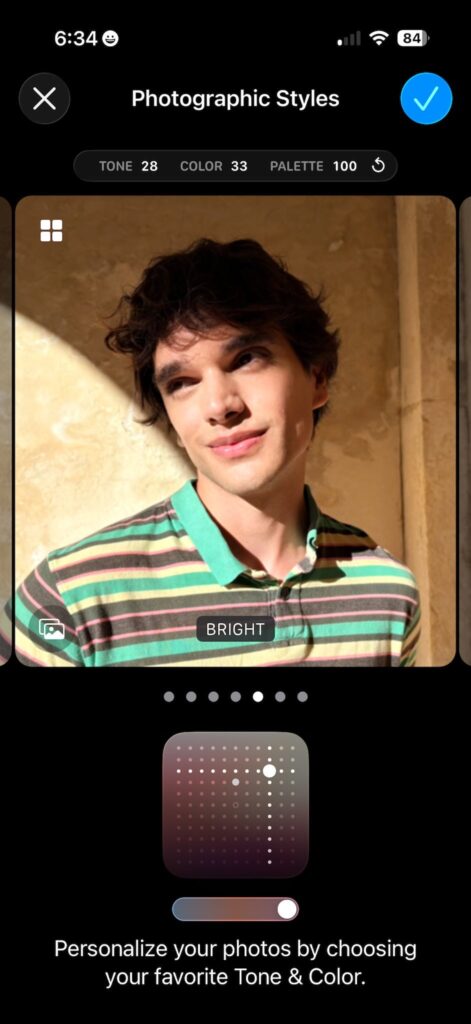
4. Adjust Photographic Styles
Photographic Styles allow you to control how the iPhone processes color, tone, and contrast.
- Open Settings.
- Tap Camera.
- Tap Photographic Styles.
- Select a style such as Standard, Rich Contrast, Vibrant, or Warm.
You can also adjust Tone and Warmth to personalize the look of your photos.
Photographic Styles apply intelligent adjustments without affecting skin tones, which makes them particularly useful for portrait photography.
5. Turn On Macro Control
Macro Control allows the camera to focus on extremely close subjects such as flowers, textures, or small objects.
- Open Settings.
- Tap Camera.
- Toggle on Macro Control.
When you move the camera close to a subject, the macro icon appears in the camera interface. Tap it to switch between macro and standard lenses.
Macro photography is excellent for capturing detail that would normally be missed by a standard camera lens.
6. Enable Grid Lines for Better Composition
Grid lines help you apply the rule of thirds, one of the most common photography composition techniques.
- Open Settings.
- Tap Camera.
- Turn on Grid.
The grid overlay helps you align your subject and horizon while taking photos. It does not appear in the final image.
7. Enable Lens Correction
Ultra-wide lenses often create distortion near the edges of the image. Lens Correction automatically adjusts the image to make it look more natural.
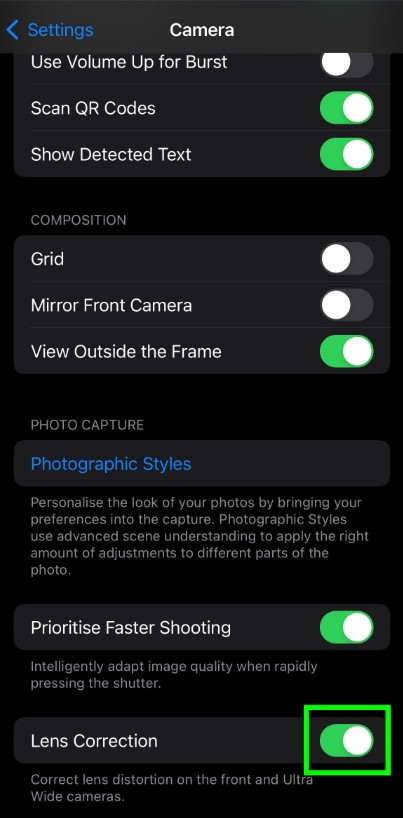
- Open Settings.
- Tap Camera.
- Turn on Lens Correction.
This feature works with the front camera and the ultra-wide lens, helping reduce distortion in group photos and landscape shots.
8. Record Video in Apple ProRes
Apple ProRes allows your iPhone to capture video with higher color accuracy and less compression.
- Open Settings.
- Tap Camera.
- Tap Formats.
- Turn on Apple ProRes.
After enabling it, open the Camera app, switch to Video, and tap ProRes before recording.
ProRes video is ideal if you plan to edit footage later because it retains much more visual information than standard video formats.
9. Adjust Exposure Manually
Manual exposure allows you to control brightness before capturing an image.
- Open the Camera app.
- Tap the arrow icon at the top of the screen.
- Tap the ± exposure icon.
- Drag the slider to adjust brightness.
Lowering exposure can prevent bright areas from becoming overexposed, while increasing exposure helps capture more detail in darker scenes.
10. Use the Volume Button as a Shutter
Using the volume button to take photos helps reduce camera shake.
- Open the Camera app.
- Frame your photo.
- Press the Volume Up or Volume Down button.
This technique is especially helpful when shooting with one hand or when holding the phone at awkward angles.
You can also combine this with portrait photography features. Our guide on how to use Portrait Mode on iPhone explains how to create background blur effects for professional-looking photos.
Tips
• Clean your camera lens before taking photos.
• Use Night Mode in low-light environments.
• Avoid heavy digital zoom whenever possible.
• Keep your iPhone updated to the latest iOS version.
• Use a tripod for night photography or long exposure shots.
If you frequently capture large photo libraries, you may also want to learn how to back up your iPhone properly so your images remain safe.
Capture Better Photos With the Right Settings
The iPhone 17 camera system is capable of producing impressive photos when properly configured. Features like Smart HDR, ProRAW, and 48MP resolution allow you to capture detailed images with balanced lighting and accurate colors.
By adjusting these settings and experimenting with composition, lighting, and exposure, you can dramatically improve your iPhone photography without needing additional equipment.
Key Takeaways
The iPhone 17 includes powerful camera hardware and advanced computational photography tools. Adjusting settings like Smart HDR, ProRAW, 48MP resolution, and Photographic Styles helps produce sharper and more balanced photos. Features such as Macro Control, Lens Correction, and manual exposure also provide better creative control. These camera adjustments help users capture professional-quality photos directly from their iPhone.
FAQs
Most settings work across the lineup, but advanced features such as ProRAW and ProRes are typically available on higher-end models like iPhone 17 Pro and Pro Max.
No. High-resolution photos take significantly more storage space, so it is best to use them when maximum detail is required.
Yes. Smart HDR helps balance highlights and shadows, especially in scenes with mixed lighting.
ProRAW preserves much more image data, which is useful for editing. However, the files are larger than standard photos.
Some features like ProRAW and ProRes require more processing power, which may slightly increase battery usage while shooting.

0 Comments