How to Turn On iMessage on iPhone, iPad, and Mac (2026 Guide)
If you want to turn on iMessage on iPhone, iPad, or Mac, Apple makes the process simple through the Messages settings and your Apple ID. Once enabled, iMessage allows you to send messages, photos, videos, and files across Apple devices using WiFi or mobile data instead of SMS.
This guide explains how to enable iMessage on all Apple devices step by step. You will also learn how to verify your Apple ID, troubleshoot activation problems, and make sure messages sync properly across your devices. If you cannot sign in to your Apple account during the process, you may first need to follow steps explained in this guide about signing into your Apple account.
Why Is iMessage Not Working on Your Device?
iMessage works only when your device is connected to the internet and signed in with a valid Apple ID. If the feature is turned off or activation fails, messages will be sent as regular SMS texts instead.
Activation issues can happen due to incorrect Apple ID settings, network problems, or outdated software. Sometimes it also occurs if your phone number is not properly registered with Apple’s messaging servers.
Below are the steps to turn on iMessage on each Apple device.
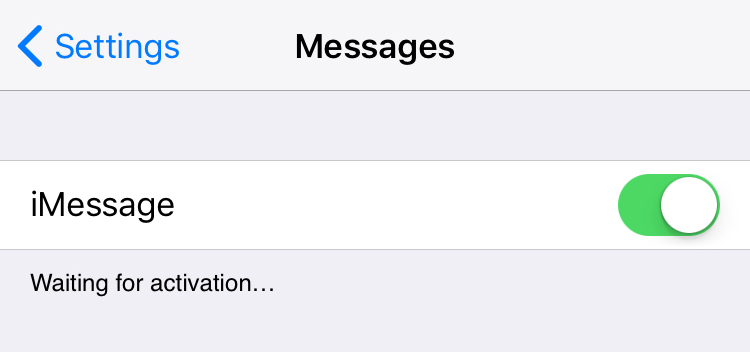
1. Turn On iMessage on iPhone
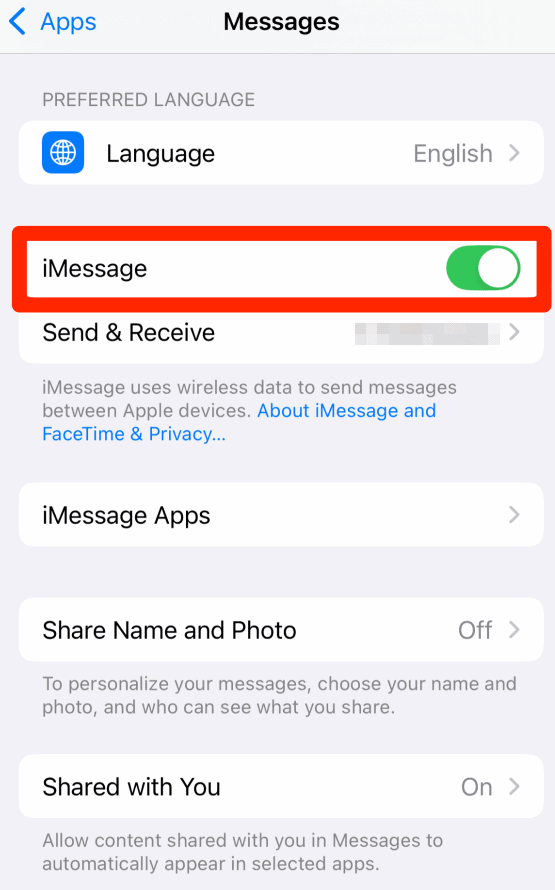
Most users enable iMessage directly from the Messages settings on their iPhone.
- Open Settings.
- Scroll down and tap Messages.
- Toggle iMessage on.
- Wait for activation to complete.
- Tap Send & Receive.
- Select your phone number and Apple ID.
Once activated, your iPhone will automatically send messages through iMessage whenever the recipient also uses an Apple device.
If verification codes fail during setup, you may need troubleshooting similar to this guide on fixing an iPhone not receiving verification texts.
2. Turn On iMessage on iPad
iPad uses your Apple ID to send and receive iMessages.
- Open Settings.
- Tap Messages.
- Turn on iMessage.
- Tap Send & Receive.
- Select the email address linked to your Apple ID.
Once enabled, your iPad can send and receive messages just like an iPhone.
3. Turn On iMessage on Mac
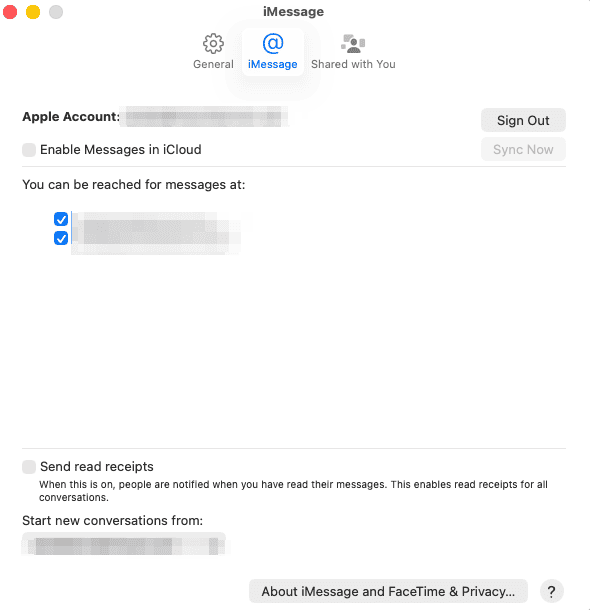
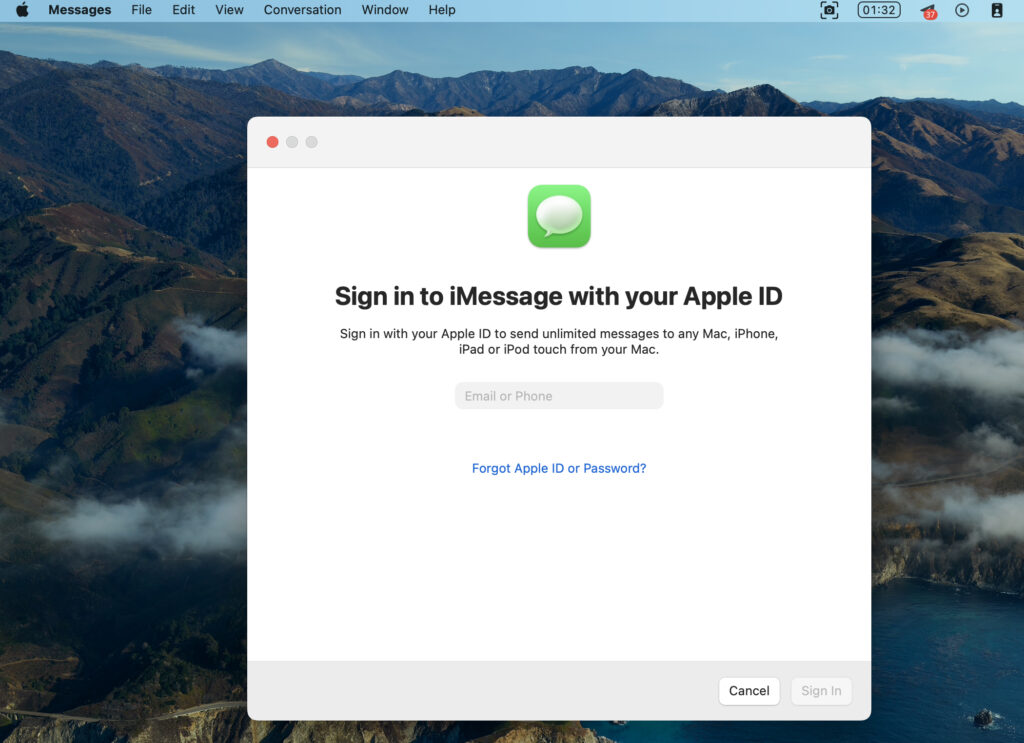
To use iMessage on a Mac, you must sign in through the Messages app.
- Open the Messages app.
- Click Messages in the menu bar.
- Select Settings.
- Click the iMessage tab.
- Sign in with your Apple ID.
- Enable Enable Messages in iCloud.
- Select the addresses where you want to receive messages.
This allows your MacBook Air, MacBook Pro, or iMac to send messages using the same Apple ID as your iPhone.
If messages fail to sync between devices, you may also need to check iCloud settings or follow steps in this guide about sending and receiving iMessage on Windows to understand cross-device messaging limitations.
4. Enable Messages in iCloud for Syncing
Turning on iCloud syncing ensures that messages stay consistent across all Apple devices.
- Open Settings on your iPhone or iPad.
- Tap your Apple ID at the top.
- Select iCloud.
- Tap Show All under apps using iCloud.
- Enable Messages.
Once enabled, conversations automatically sync between your iPhone, iPad, and Mac.
5. Fix iMessage Activation Problems
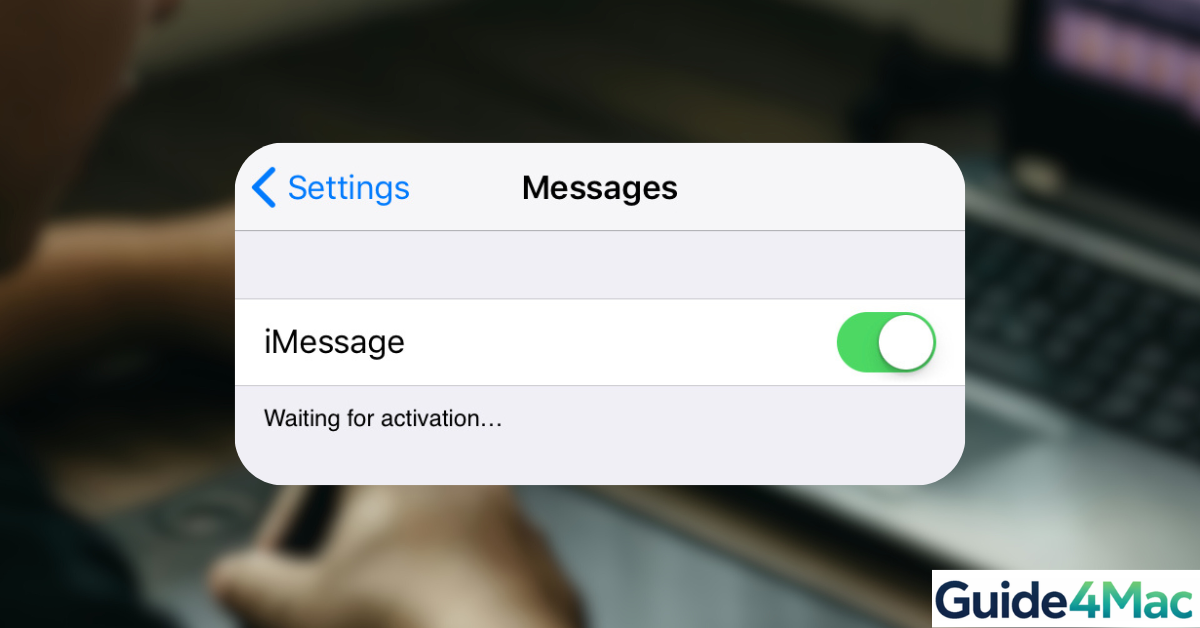
Sometimes iMessage may show “Waiting for activation.” This usually resolves within a few minutes, but several fixes can help.
Try the following steps:
- Check that WiFi or mobile data is enabled.
- Confirm your Apple ID is signed in.
- Restart your iPhone, iPad, or Mac.
- Turn iMessage off and back on.
- Update your device to the latest version of iOS or macOS.
Activation issues usually occur due to network delays or Apple server verification.
Tips
• Make sure all devices use the same Apple ID.
• Enable two factor authentication for better security.
• Keep your devices updated to the latest iOS or macOS version.
• Use WiFi during activation to avoid carrier restrictions.
• Enable Messages in iCloud for full syncing.
Enjoy Messaging Across All Apple Devices
Once iMessage is enabled, messaging becomes seamless across the Apple ecosystem. Your iPhone, iPad, and Mac will all receive the same conversations, attachments, and group chats automatically.
This integration is one of the biggest advantages of Apple devices. With proper setup and iCloud syncing enabled, you can start a conversation on your iPhone and continue it instantly on your Mac or iPad.
Key Takeaways
Turning on iMessage requires only a few steps inside the Messages settings on iPhone, iPad, or Mac. After activation, messages are sent through Apple’s servers using your Apple ID instead of standard SMS.
Ensuring that iCloud syncing and the correct Apple ID are enabled will allow your conversations to stay synchronized across all devices.
FAQs
Activation may fail if your device lacks internet access, your Apple ID is not verified, or Apple servers are temporarily unavailable.
Yes. An Apple ID is required to activate iMessage on iPhone, iPad, and Mac.
Yes. As long as you sign in with your Apple ID in the Messages app, your Mac can send and receive iMessages.
Yes. iMessage works with mobile data if WiFi is not available.
This usually happens if the recipient does not use an Apple device or if iMessage is turned off
0 Comments