How to Fix iPad Black Screen of Death: 6 Ways

The iPad black screen of death happens when your device suddenly shows a completely black display and stops responding to touch or buttons. It can affect any model, including iPad Pro, iPad Air, and standard iPads running modern versions of iPadOS.
In many cases the issue is caused by a frozen system, a drained battery, or a software failure after an update. This guide explains several practical fixes, from quick resets to recovery mode restores, so you can bring your iPad back to life without replacing the device.
If you recently attempted troubleshooting steps like restarting or resetting your tablet, you might also want to review how to properly reset your iPad in certain situations.
Why Is Your iPad Showing a Black Screen?
A black screen on an iPad usually indicates that the device cannot load the interface or power the display. The system might still be running in the background, but the screen remains completely dark.
Common causes include:
- A frozen iPadOS process
- Completely drained battery
- Faulty display backlight
- Failed system update
- Hardware damage or loose internal components
Fortunately, many black screen problems are temporary and can be fixed with a few troubleshooting steps.
1. Force Restart Your iPad
A force restart clears temporary system glitches that can freeze iPadOS and cause the display to go black. Apple recommends this method as the first troubleshooting step.
For iPads without a Home button

- Press and release the Volume Up button.
- Press and release the Volume Down button.
- Press and hold the Top button.
- Release the button when the Apple logo appears.
The restart usually happens within about 10 seconds, although sometimes it may take up to a minute.
For iPads with a Home button

- Press and hold the Home button.
- Press and hold the Top (Power) button.
- Keep holding both buttons.
- Release them when the Apple logo appears.
If the screen lights up after the restart, the issue was likely a temporary software freeze.
2. Make Sure Your iPad Is Charged
A completely drained battery can leave the iPad stuck on a black screen without even showing the low battery symbol. This often happens when the battery reaches zero power.

- Connect your iPad to a wall charger.
- Use an Apple-certified cable and adapter.
- Leave the device charging.
- Wait at least 1 to 2 hours before trying to turn it on.
If the battery was deeply discharged, the iPad may need several hours before it boots again. If charging problems persist, check guides like fixing an iPhone not charging since many troubleshooting steps also apply to iPads.
3. Check If the Display Is the Problem Using QuickTime
Before assuming your iPad is completely broken, you should check if the logic board is still active. Sometimes the iPad is “alive”—receiving emails and notifications—but the backlight or LCD panel has physically failed.
You can perform a “Ghost Screen” diagnostic by mirroring the iPad’s internal video signal to a Mac using QuickTime Player.
- Connect the iPad:
Plug your iPad into your Mac.
Note: If you hear a “chime,” that is a great sign—it means the iPad is receiving power. - Launch QuickTime:
Open QuickTime Player on your Mac (found in the Applications folder).
- Initiate Recording:
Go to the top menu and select File > New Movie Recording.
- Change the Input:
A recording window will open (usually showing your Mac’s webcam). Click the small downward arrow (∨) next to the red Record button.
- Select Your iPad:
Under the Camera and Microphone sections, click on the name of your iPad.
If your iPad screen appears on the Mac: This confirms the iPad is alive. Your internal software and logic board are functioning perfectly, but your physical LCD or backlight has failed. You do not need a new iPad; you need a screen repair from Apple Support or an authorized service provider.
If the Mac displays “No Device Found”: This indicates the iPad is not booting or is not communicating with the computer. The issue is likely a software crash, a severely depleted battery, or a failed logic board. In this case, you should proceed to Method 4 (Recovery Mode) to attempt a system restore.
4. Restore the iPad Using Recovery Mode
If your iPad does not respond to restarts or charging, restoring the operating system through Recovery Mode may fix the issue. This reinstalls iPadOS while attempting to keep your data intact.
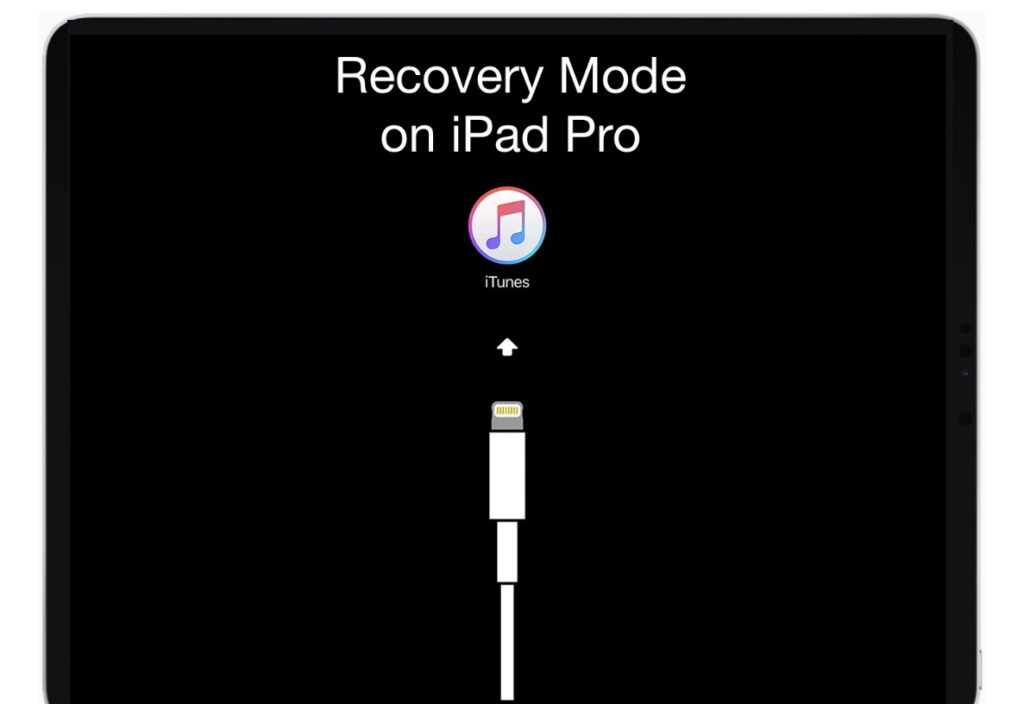
- Connect your iPad to a computer.
- Open Finder on macOS or iTunes on Windows.
- Perform the force restart button combination.
- Keep holding the button until the Recovery Mode screen appears.
After the device enters recovery mode:
- Select your iPad in Finder or iTunes.
- Click Update when prompted.
This downloads and reinstalls iPadOS, which can take an hour depending on your internet speed.
If the update fails, repeat the process and choose Restore, which erases all data and installs a fresh system.
If you need guidance for entering recovery mode manually, this detailed walkthrough may help: putting an iPad into recovery mode.
5. Restore the iPad Using DFU Mode
DFU mode, Device Firmware Update mode, is a deeper restore process used to repair severe firmware issues. It completely reinstalls iPadOS from scratch.
The screen remains black in DFU mode, which is normal.
For iPads without a Home button
- Press and release Volume Up.
- Press and release Volume Down.
- Press and hold the Top button until the screen turns off.
- Immediately hold the Volume Down button while still holding the Top button.
- Hold both buttons for 5 seconds.
- Release the Top button.
- Continue holding Volume Down until the computer detects the iPad.
For iPads with a Home button
- Press and hold the Home button.
- Press and hold the Top button.
- Hold both for 8 seconds.
- Release the Top button.
- Keep holding the Home button until the computer detects the device.
Once detected, follow the on-screen instructions in Finder or iTunes to restore the device.
6. Check for Apple Repair or Service Programs
If none of the software solutions work, the issue may be hardware related. A failed display, loose internal connector, or damaged logic board can cause the black screen problem.
You should:
- Check your device warranty.
- Visit Apple Support.
- Schedule a diagnostic appointment.
If your device is still under warranty or covered by AppleCare+, repairs may be free.
Tips
- Always use an Apple-certified charging cable.
- Clean the charging port carefully if the iPad does not charge.
- Avoid letting the battery drain to 0 percent frequently.
- Install iPadOS updates regularly to prevent system bugs.
- Back up your iPad with iCloud or a computer before performing restores.
Bring Your iPad Back to Life
Seeing your iPad stuck on a black screen can feel alarming, especially if the device suddenly stopped responding. Fortunately, most cases are caused by software glitches or battery issues that can be fixed with a force restart or a system restore.
If none of the troubleshooting methods work, the problem may be hardware related, such as a damaged display or logic board. In that case, a repair through Apple or an authorized technician is the safest solution.
Key Takeaways
The iPad black screen of death usually appears when the system freezes, the battery is drained, or the display fails. Simple fixes like force restarting the device or charging it for several hours often resolve the issue. More advanced solutions include restoring iPadOS through Recovery Mode or DFU Mode. These methods help users recover an unresponsive iPad without immediately replacing the device.
FAQ
This usually means the device is running but the display or backlight has failed. It can also happen when iPadOS freezes. A force restart is often enough to fix the problem.
Yes. If the battery is completely drained, the iPad may not show the charging icon or low battery screen. Charging it for several hours may restore normal operation.
An update through Recovery Mode usually keeps your data. However, choosing the Restore option or using DFU mode will erase the device completely.
You can connect the iPad to a Mac and mirror the screen using QuickTime. If the screen appears on the computer, the iPad is working but the display hardware is likely damaged.
If software fixes do not work, a hardware repair is usually required. Checking warranty coverage first can help reduce repair costs.


0 Comments