How to Put an iPad in Recovery Mode [Easy Guide]
Knowing how to put an iPad in Recovery Mode is essential when your device gets stuck during an update, freezes on the Apple logo, or fails to restore normally. Recovery Mode allows you to reinstall iPadOS using a Mac or Windows computer when standard troubleshooting methods no longer work.
In this guide, you will learn how to enter Recovery Mode on different iPad models and restore the device safely. If your iPad becomes completely unresponsive during the process, you may also want to follow troubleshooting methods similar to fixing an iPad black screen issue which sometimes appears alongside firmware failures.
Why Would You Put an iPad in Recovery Mode?
Recovery Mode is a special diagnostic state that allows your iPad to communicate with Finder, iTunes, or Apple Configurator to reinstall the operating system. It is commonly used when a device cannot boot normally.
This mode becomes useful if an iPad update fails, the device is stuck in a restart loop, or you need to reinstall iPadOS after a system corruption. In many cases, Recovery Mode fixes software problems without requiring hardware repairs.
1. Prepare Your Computer and iPad
Before entering Recovery Mode, make sure your setup is ready so the restore process runs smoothly.
- Charge your iPad to at least 50 percent.
- Use a certified USB cable to connect the device.
- Open Finder on a Mac running macOS Catalina or later.
- Open iTunes if you are using a Windows PC or an older Mac.
- Connect your iPad to the computer.
Once connected, you can start the button sequence required to enter Recovery Mode.
2. Put an iPad With Face ID Into Recovery Mode
Newer iPad models such as iPad Pro and iPad Air without a Home button use a different button combination.
Time needed: 2 minutes
Requirements: A Mac or PC and a compatible USB-C or Lightning cable.
- Connect to Your Computer
Use a high-quality USB cable to connect your iPad to your Mac or Windows PC. Ensure Finder (on macOS) or iTunes/Apple Devices App (on Windows) is open and running
- Press and Release Volume Up
Quickly press and release the Volume Up button located on the side (or top, depending on your model’s orientation). Do not hold it down; a quick tap is sufficient.
- Press and Release Volume Down
Immediately after releasing the first button, quickly press and release the Volume Down button.
- Press and Hold the Top Button
Press and hold the Top button (Power button). You must continue to hold this button even when you see the Apple logo appear on the screen.
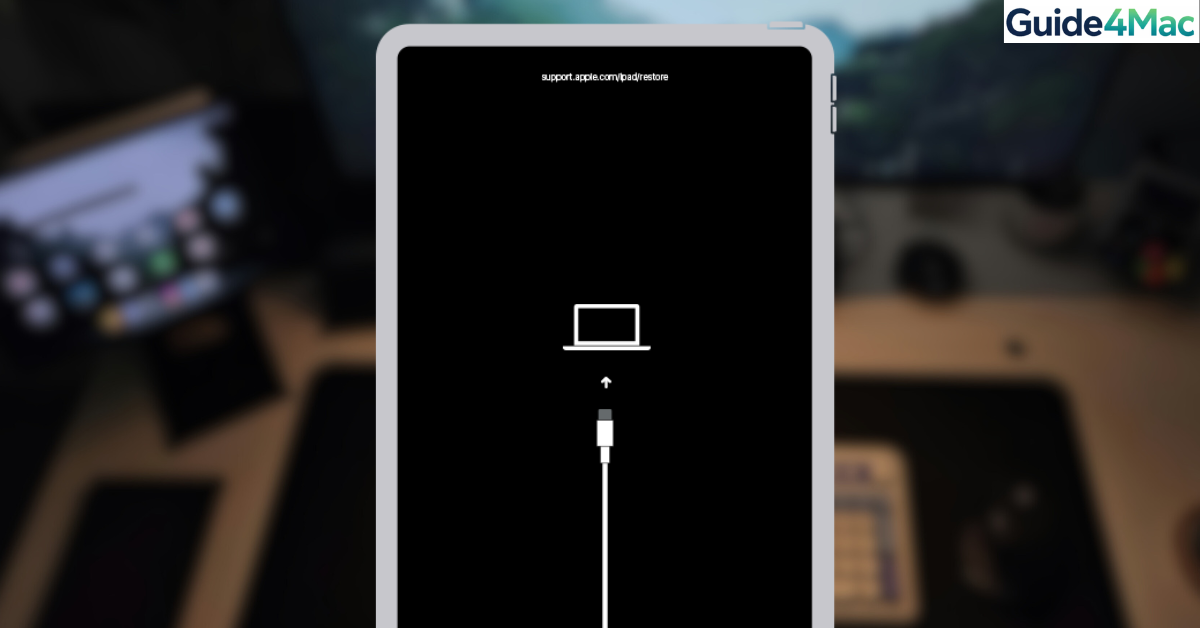
- Wait for the Recovery Mode Screen
Keep holding the Top button until you see the Recovery Mode screen, which displays an icon of a computer and a cable. Once this appears, you can release the button. Your computer should now show a prompt to Update or Restore.

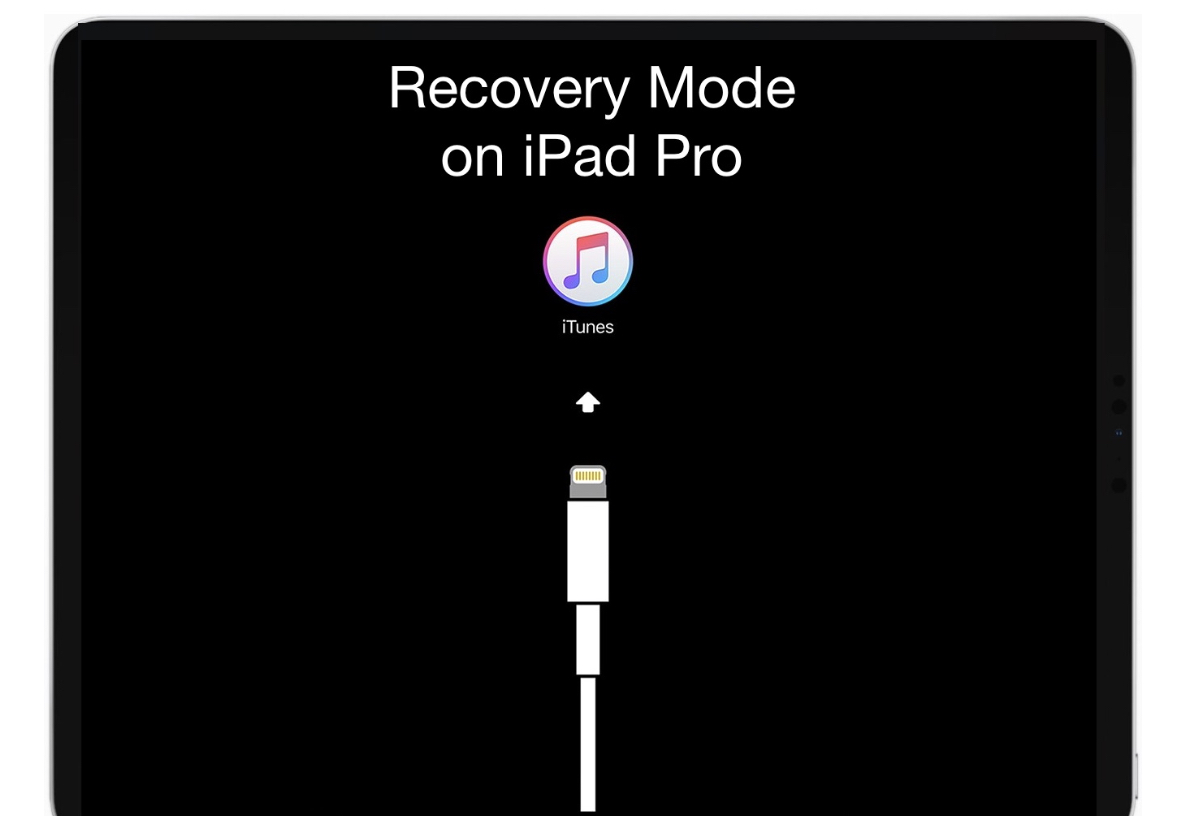
3. Put an iPad With a Home Button Into Recovery Mode
Older models such as the iPad 9th generation or earlier use the Home button for Recovery Mode.
- Connect the iPad to your computer using a USB cable.
- Press and hold the Home button.
- Press and hold the Top or Power button.
- Continue holding both buttons until the Recovery Mode screen appears.
Release the buttons once the recovery screen appears on the display.
4. Restore or Update the iPad in Finder or iTunes
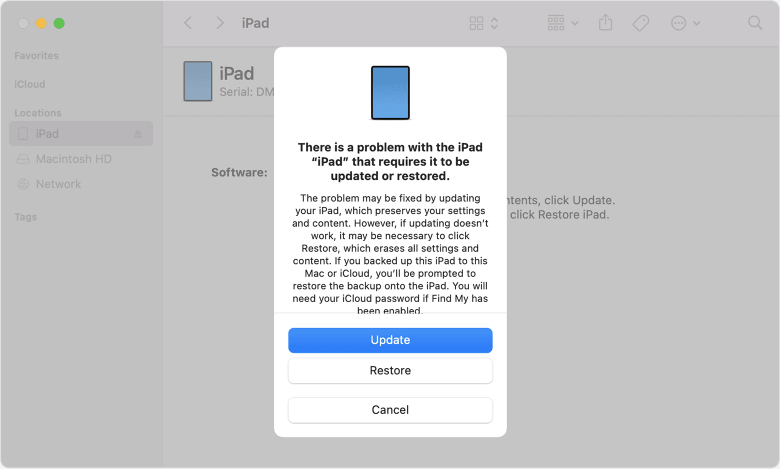
After entering Recovery Mode, your computer will detect the iPad and show options to update or restore the device.
- Open Finder or iTunes on your computer.
- Select the connected iPad.
- Click Update to reinstall iPadOS without deleting data.
- Click Restore to erase the device and install a fresh system.
The update process downloads the latest iPadOS version directly from Apple.
5. Exit Recovery Mode Without Restoring
If you accidentally entered Recovery Mode, you can exit it without reinstalling the system.
- Press and hold the Top button.
- Continue holding until the Apple logo appears.
- Release the button when the device begins restarting.
Your iPad should boot normally if no major system problem exists.
6. Use DFU Mode if Recovery Mode Fails
If Recovery Mode does not solve the problem, DFU Mode may be required. DFU Mode bypasses the operating system and performs a deeper firmware restore.
- Connect the iPad to your computer.
- Press and release Volume Up.
- Press and release Volume Down.
- Hold the Top button for 10 seconds.
- Hold Volume Down while still holding the Top button.
- Release the Top button after 5 seconds.
- Continue holding Volume Down until Finder detects the device.
DFU Mode is commonly used when firmware corruption prevents normal restores.
7. Restore Your Data After Recovery Mode
If you choose the restore option, your iPad will be erased and reset to factory settings. After the process finishes, you can restore your files.
- Turn on the iPad after the restore completes.
- Follow the setup assistant.
- Select Restore From iCloud Backup.
- Sign in with your Apple ID.
- Choose the most recent backup.
If you want to avoid losing data in the future, it is helpful to regularly create backups using a complete guide on how to back up an iPhone or iPad.
Tips
• Always use original or certified USB cables to avoid restore errors.
• Ensure your internet connection is stable during firmware downloads.
• Avoid disconnecting the iPad while Finder or iTunes is installing iPadOS.
• Keep at least 5 GB of free space on your computer for firmware downloads.
• Restart both the computer and the iPad if the device is not detected.
Restoring Your iPad the Right Way
Putting an iPad into Recovery Mode is one of the most effective ways to fix serious software problems. It allows Finder or iTunes to reinstall iPadOS and restore normal system functionality.
Most issues such as failed updates, boot loops, or frozen screens can be fixed using this method. If Recovery Mode does not work, DFU Mode offers a deeper restore option before considering hardware repair or Apple Support.
Key Takeaways
Recovery Mode is a built in troubleshooting feature that helps reinstall iPadOS when the device cannot boot normally. Entering this mode requires specific button combinations depending on whether your iPad has a Home button or Face ID. Once activated, Finder or iTunes allows you to update or fully restore the system. This method resolves many serious software problems without needing professional repair.
FAQ
Recovery Mode helps reinstall iPadOS when the device cannot start normally or when an update fails.
Choosing Update usually keeps your data. Selecting Restore erases the device and installs a clean version of iPadOS.
This can happen if the restore process fails or the device loses connection during installation.
No. DFU Mode performs a deeper firmware restore and bypasses the operating system completely.
Yes. Hold the Top button until the Apple logo appears to restart the device normally.


0 Comments