Create a New @iCloud.com Email: Best Practices and Tips for 2026

If you want to create an iCloud email address, Apple allows you to generate one directly from your iPhone, iPad, or Mac. An iCloud email uses the @icloud.com domain and works seamlessly with Apple services such as Mail, iMessage, FaceTime, and iCloud storage.
An iCloud Mail address is also linked to your Apple ID, which means it can be used for syncing messages, backups, and account security across devices. In this guide, you will learn how to create a new iCloud email address, enable iCloud Mail, and access your inbox from any Apple device. If you are setting up a new Apple account, it may also help to understand how to sign in to your Apple account correctly before enabling iCloud Mail.
Why Would You Create an iCloud Email Address?
An iCloud email address provides a private and secure inbox integrated into Apple’s ecosystem. Once created, it automatically works across devices like iPhone, iPad, Mac, and even Windows through the iCloud web interface.
Benefits of using iCloud Mail include:
• Seamless syncing with the Mail app on Apple devices
• Built-in spam filtering and privacy protection
• Integration with Apple ID services
• Access through iCloud.com from any browser
• Automatic syncing across all Apple devices
Once enabled, you can also send and receive emails directly from the native Mail app.
1. Create an iCloud Email on iPhone or iPad
When choosing your @icloud.com address, remember that this is permanent. While you can create “Email Aliases” later to hide your real address, the primary iCloud email you create here cannot be renamed or deleted without deleting the entire Apple ID. Choose a professional handle that you’re happy to keep long-term.
Time needed: 5 minutes
- Enter Apple ID Settings:
Open Settings and tap your Apple ID name at the very top.
- Access Cloud Services:
Select iCloud
.
- Initiate Setup:
Tap on iCloud Mail (or just “Mail”).
- The Trigger:
Toggle on Sync this iPhone. If you don’t already have an address, a pop-up will appear.
- Create Your Handle:
Tap Create when prompted by the system.
- Check Availability:
Enter your desired username (e.g.,
yourname@icloud.com). If it’s taken, iOS will offer suggestions. - Finalize:
Tap Next, then Done to confirm.
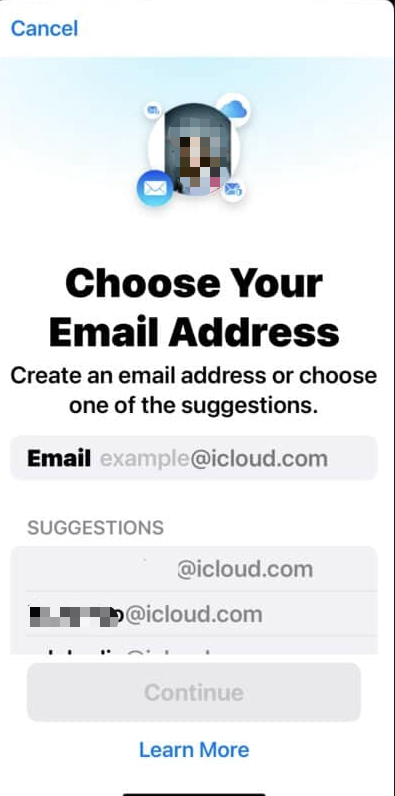
After confirmation, your iCloud email will be ready to use in the Mail app.
2. Create an iCloud Email Address on Mac
If you use a Mac, you can enable iCloud Mail through System Settings.
- Click the Apple menu.
- Select System Settings.
- Click your Apple ID.
- Choose iCloud.
- Click Mail.
- Enable iCloud Mail.
- Enter the email name you want.
- Confirm the address.
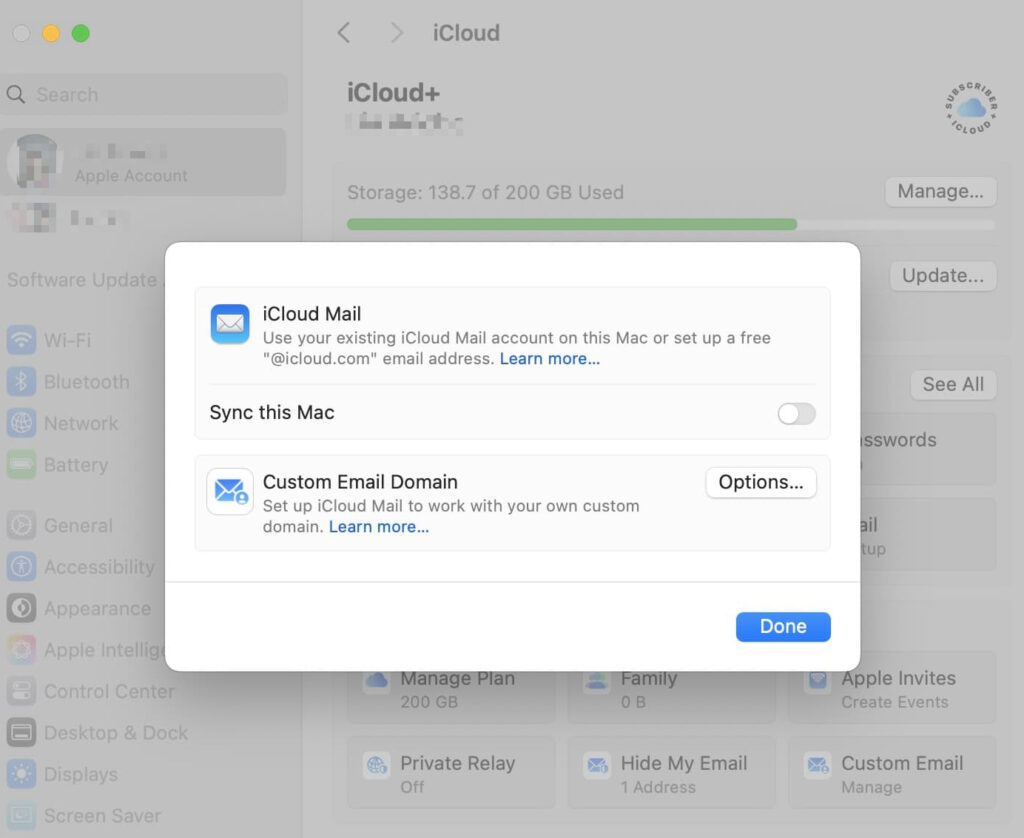
Once created, the Mail app on macOS will automatically configure your inbox.
3. Create an iCloud Email Through iCloud.com
If you do not currently have an Apple device nearby, you can create and manage iCloud email settings from the web.
- Open a browser and go to iCloud.com.
- Sign in with your Apple ID.
- Open the Mail section.
- Follow the prompts to create an @icloud.com email address.
This allows you to access iCloud Mail from Windows PCs or other devices as well.
4. Access Your iCloud Email in the Mail App
After creating your email address, your inbox will automatically appear in Apple’s Mail app.
- Open the Mail app on your iPhone, iPad, or Mac.
- Look for the iCloud mailbox in the sidebar.
- Tap or click the mailbox to view messages.
You can now send and receive emails using your new iCloud address.
If you plan to manage multiple email accounts on your iPhone, you may also want to learn how to change your email password on iPhone to keep all accounts secure.
5. Set iCloud Mail as Your Default Email (Optional)
If you prefer using iCloud Mail for outgoing messages, you can set it as the default email account.
- Open Settings.
- Tap Mail.
- Select Default Account.
- Choose iCloud.
This ensures new emails automatically send from your iCloud address.
Tips
• Choose a professional or simple email name since it cannot be changed later.
• Use strong Apple ID security to protect your email account.
• Enable two factor authentication for additional protection.
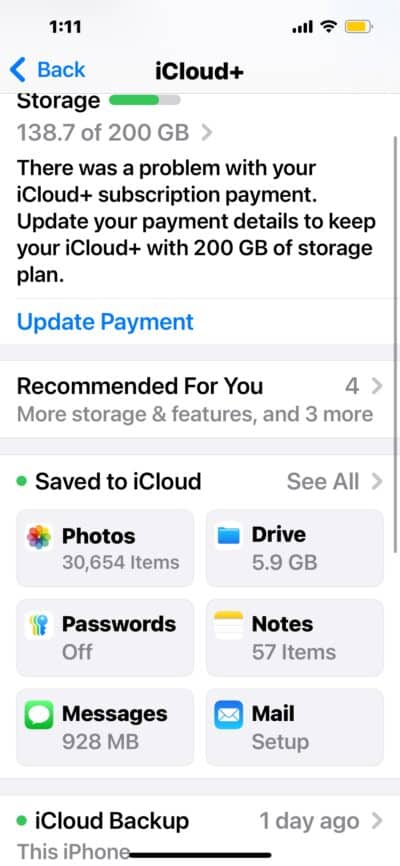
• Regularly check your iCloud storage usage if you receive many attachments.
• Use iCloud Mail filters to organize messages automatically.
Start Using Your New iCloud Email
Creating an iCloud email address is quick and provides a reliable inbox integrated with Apple services. Once enabled, your email automatically syncs across your iPhone, iPad, Mac, and any browser using iCloud.com.
With iCloud Mail active, you can send messages, receive important notifications, and manage communication across all your Apple devices without needing third-party email providers.
Key Takeaways
Creating an iCloud email address allows you to use an @icloud.com inbox connected to your Apple ID. You can generate the address from your iPhone, iPad, Mac, or iCloud.com. Once created, the email automatically syncs through the Mail app across Apple devices. This makes it easy to send and receive messages within the Apple ecosystem.
FAQs
Not exactly. Your Apple ID can use any email address, but creating an iCloud email adds a dedicated @icloud.com inbox linked to your account.
No. Once you create an @icloud.com address, it cannot be changed, although you can add email aliases.
Yes. Emails and attachments count toward your iCloud storage quota.
Yes. You can access your inbox by signing in to iCloud.com from any web browser.
You can create email aliases under your main iCloud Mail account, but you can only have one primary @icloud.com address.
0 Comments