How to Turn Off Safety Filter in iPhone Photos?

The Safety Filter in iPhone Photos Clean Up can sometimes prevent you from removing objects or blemishes from pictures. Instead of erasing the selected area, the Photos app may blur or pixelate parts of the image because it incorrectly detects sensitive content.
If the Clean Up tool keeps triggering the safety filter, there are a few reliable workarounds. This guide explains how to bypass the filter, fix pixelated edits, and troubleshoot the feature so you can remove unwanted objects normally. If you often edit images, you may also want to learn how to reduce iPhone photo file sizes to save storage space.
Why Is the Safety Filter Triggering in iPhone Photos?
Apple introduced the Clean Up tool in the Photos app as part of Apple Intelligence image editing features. It allows you to remove distractions or unwanted elements directly from photos without installing additional apps.
The feature also includes a safety filter that prevents edits when the system detects faces or potentially sensitive content. In some situations, the AI incorrectly flags normal areas of the photo, which causes the edit to be blocked or pixelated.
Crop and Zoom to Bypass the Safety Filter
The most reliable workaround is cropping or zooming into the area you want to edit. By isolating a smaller section of the image, the Photos app analyzes less context and the safety filter usually stops triggering.
Bypass safety filter with crop and zoom:
- Open the Photos app.
- Select the image you want to edit.
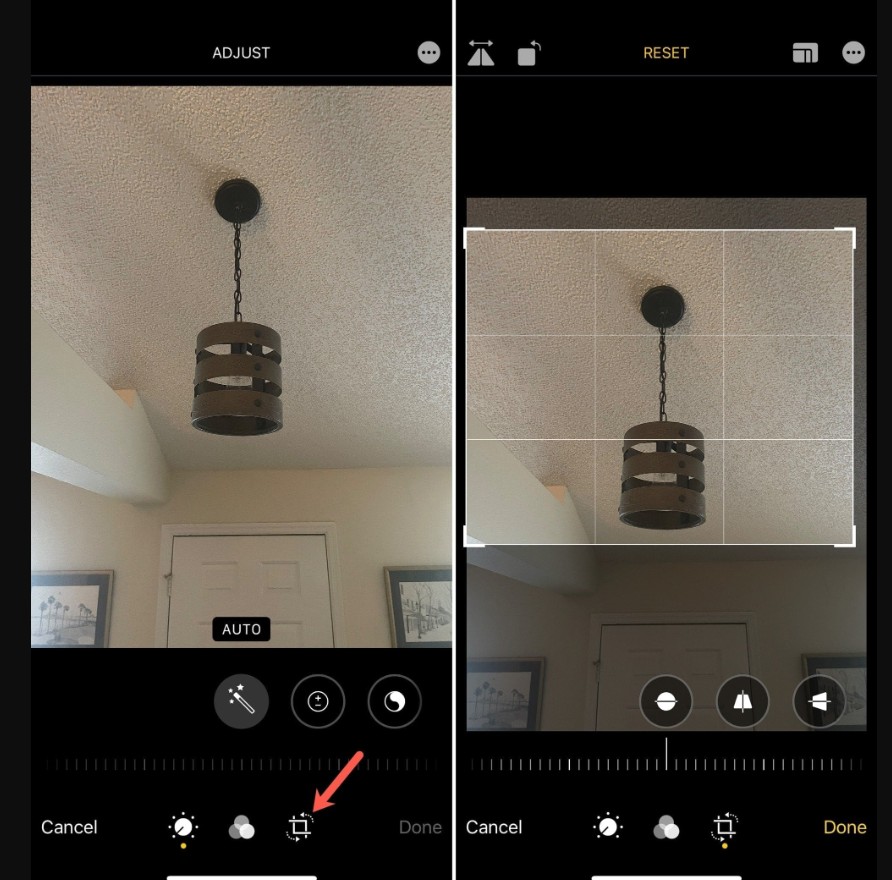
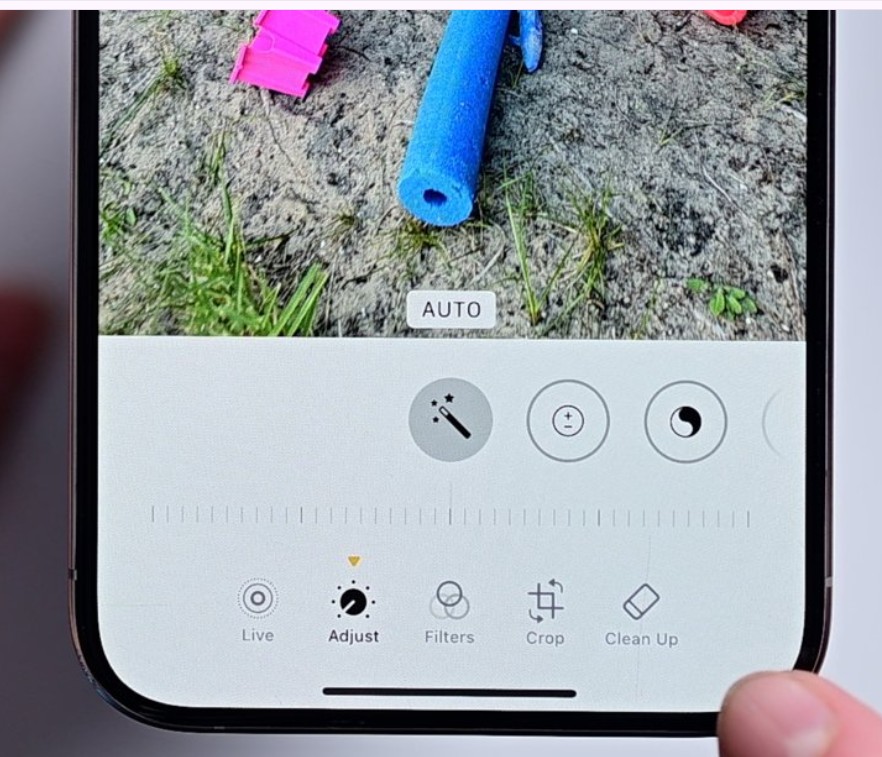
- Tap Edit in the upper right corner.
- Tap the Crop icon at the bottom.

- Use a pinch gesture to zoom into the area you want to edit.
- Tap the Clean Up tool.
- Wait for the Photos app to regenerate the background.
- Tap the Crop tab again.
- Zoom back out to restore the original framing.
- Tap Done.
Because the Clean Up tool processes only the zoomed portion of the image, the filter usually does not activate.
Reset the Clean Up Selection
If the filter activates immediately after selecting an object, resetting the edit sometimes fixes the issue.
- Open the photo in the Photos app.
- Tap Edit.
- Select Clean Up.
- Tap Reset if the image becomes pixelated.
- Try selecting the object again with a smaller brush.
The AI often processes the selection differently on the second attempt.
Remove the Pixelated Area Manually
Sometimes the Clean Up tool applies a blur instead of removing the object. You can erase that blurred area using the same editing tool.
- Open the edited image.
- Tap Edit.
- Select Clean Up again.
- Draw over the blurred or pixelated area.
- Wait for the background to regenerate.
- Tap Done to save.
This forces the Photos app to rebuild the section using nearby image data.
Update iOS to the Latest Version
Many Clean Up tool issues are caused by software bugs that Apple fixes in later updates.
- Open Settings.
- Tap General.
- Select Software Update.
- Install any available update.
New iOS releases frequently improve Apple Intelligence photo editing.
Disable Communication Safety
If Communication Safety is enabled, it may influence how images are analyzed on the device.
- Open Settings.
- Tap Screen Time.
- Select Communication Safety.
- Toggle the feature Off.
This step does not always fix the issue but may help if parental controls are active.
Duplicate the Photo Before Editing
Duplicating the image resets editing metadata and sometimes prevents the safety filter from activating.
- Open the Photos app.
- Select the photo you want to edit.
- Tap the three-dot menu.
- Choose Duplicate.
- Edit the duplicated version using the Clean Up tool.
This forces the editor to treat the file as a new photo.
Tips
• Duplicate photos before editing so you always keep the original version.
• Zoom into smaller areas when using the Clean Up tool for better results.
• Install iOS updates regularly to receive Apple Intelligence improvements.
• Use smaller brush strokes when selecting objects to remove.
• Enable iCloud backup to protect original photos.
Editing Photos Without Frustration
The Clean Up tool in the iPhone Photos app is designed to quickly remove unwanted objects, but the Safety Filter can occasionally interrupt normal edits. When that happens, small adjustments such as cropping, resetting selections, or duplicating the image usually solve the problem.
Once you understand how the Photos app analyzes images, it becomes easier to avoid triggering the filter. With these techniques, you can continue editing pictures normally without relying on third-party apps.
Key Takeaways
The iPhone Photos Clean Up feature uses AI to remove unwanted objects from images. However, the built-in Safety Filter may activate if the system believes sensitive content is present. Cropping or zooming into the area before using Clean Up is the most reliable workaround. These steps help iPhone users edit photos normally until Apple improves the feature in future updates.
FAQ
No. Apple does not provide a setting that fully disables the Safety Filter. It is built into the Clean Up tool to prevent certain types of edits.
The Photos app may apply a blur or pixelation effect if it detects faces or sensitive areas. This safety measure sometimes activates incorrectly.
No. Cropping during editing only changes the area the tool analyzes. After finishing the edit, you can restore the original framing.
The feature is available on newer iPhones running modern iOS versions that support Apple Intelligence photo editing.
Yes. Photo edits in the Photos app are non-destructive. You can open the image, tap Edit, and choose Revert to restore the original photo.


0 Comments