How to Fix iPhone/iPad Restore Error 1109 [2026 Guide]
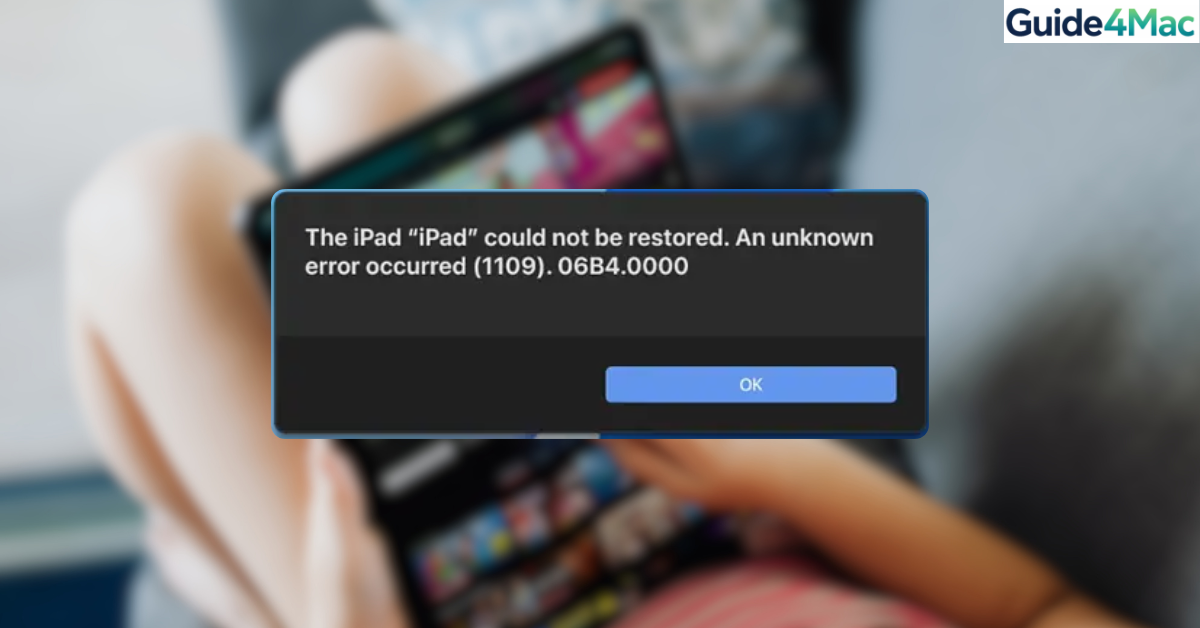
iPhone Restore Error 1109 usually appears when you try to restore or update an iPhone or iPad using Finder or iTunes. The error interrupts the restore process, leaving the device stuck in recovery mode or unable to complete the software installation.
This problem typically occurs because of unstable USB connections, outdated software, corrupted firmware files, or communication failures between the device and your computer. In this guide, you will learn several proven ways to fix error 1109 and successfully restore your iPhone or iPad. Before restoring your device, it is always recommended to create a backup using methods explained in this guide on protecting your data with a proper iPhone backup.
Why Does iPhone Restore Error 1109 Occur?
Error 1109 happens when the restore process fails while the computer communicates with the device. This can happen during firmware verification, USB data transfer, or when Finder or iTunes cannot complete the installation of iOS.
Several factors can trigger this issue. These include outdated system software, faulty USB cables, corrupted firmware downloads, or security software interfering with the restore process.
Below are the most effective solutions to fix iPhone or iPad restore error 1109.
1. Restart Your iPhone and Computer
A simple restart can clear temporary glitches that interrupt the restore process.
- Disconnect the iPhone or iPad from the computer.
- Restart the iPhone.
- Restart the Mac or Windows computer.
- Reconnect the device using the cable.
- Open Finder or iTunes.
- Attempt the restore again.
Restarting both devices refreshes system processes and can resolve temporary communication errors.
2. Update Finder or iTunes
Outdated software may not properly communicate with newer versions of iOS.
- On a Mac, open System Settings.
- Select General.
- Click Software Update.
- Install any available macOS updates.
If you use Windows:
- Open iTunes.
- Click Help.
- Select Check for Updates.
- Install the latest version.
Using the newest software ensures compatibility with the latest iOS firmware.
3. Try a Different USB Cable or Port
A faulty USB cable or port can interrupt the restore process.
- Disconnect the current USB cable.
- Use a different Apple-certified Lightning or USB-C cable.
- Connect the cable directly to the computer.
- Avoid USB hubs or adapters.
- Open Finder or iTunes.
- Attempt the restore again.
Stable USB communication is essential during the restore process.
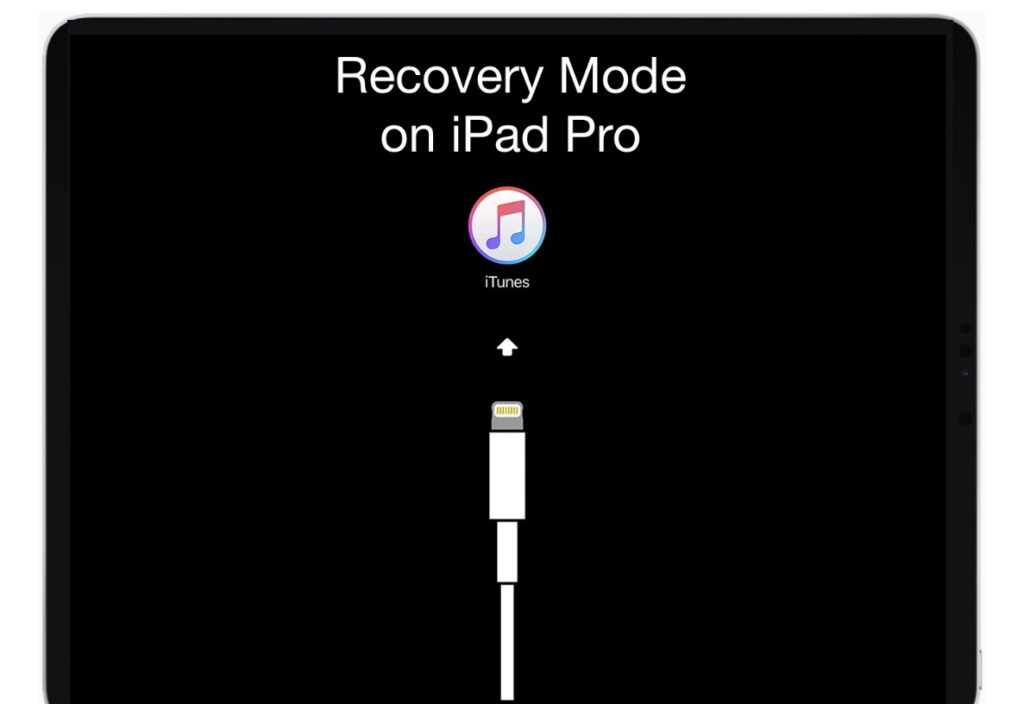
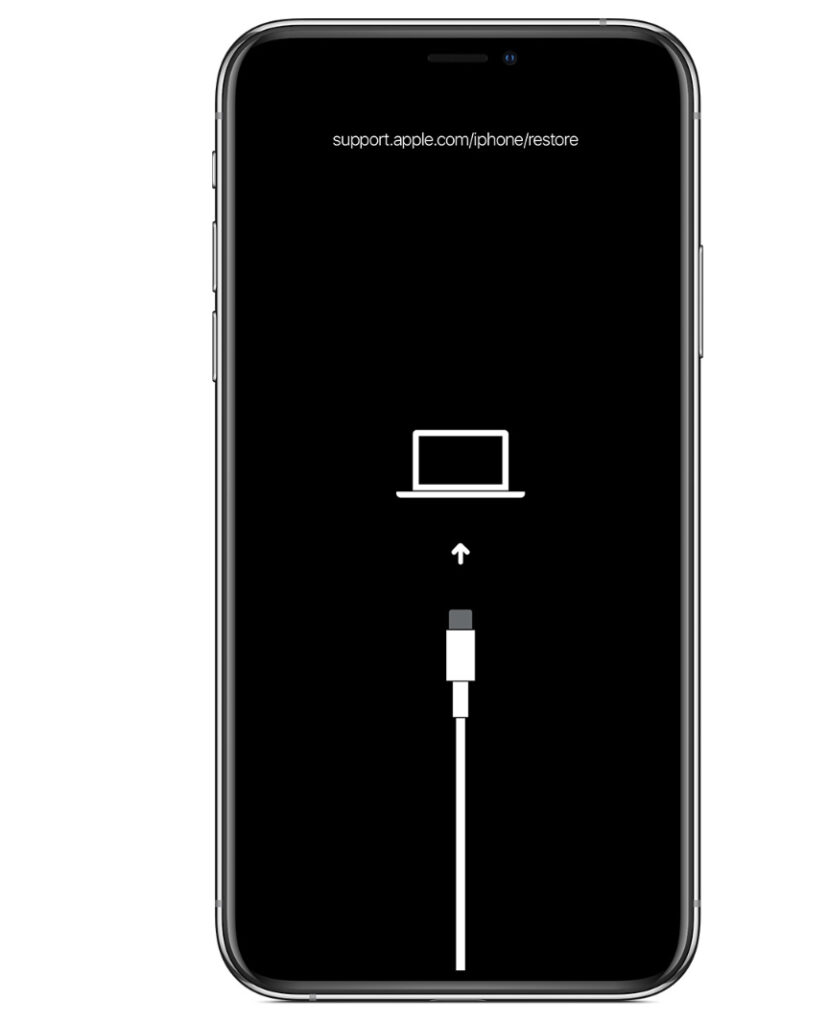
4. Put the iPhone in Recovery Mode
Recovery Mode allows Finder or iTunes to reinstall iOS even if the device cannot boot normally.
- Connect the iPhone to your computer.
- Open Finder or iTunes.
- Press and release the Volume Up button.
- Press and release the Volume Down button.
- Press and hold the Side button.
- Release the button when the Recovery Mode screen appears.
Finder or iTunes should now detect the device and offer options to update or restore it.
If your device becomes stuck during this process, follow this guide on putting an iPad into recovery mode for additional steps that also apply to many iPhone models.
5. Use DFU Mode to Restore the Device
DFU mode performs a deeper restore that bypasses the current operating system.
- Connect the iPhone to your computer.
- Open Finder or iTunes.
- Press and release Volume Up.
- Press and release Volume Down.
- Press and hold the Side button for about 10 seconds.
- While holding the Side button, press and hold the Volume Down button.
- Continue holding both buttons for 5 seconds.
- Release the Side button but keep holding Volume Down.
- Wait until the computer detects the iPhone in recovery mode.

DFU mode is helpful when standard recovery mode does not resolve restore errors.
6. Download the Firmware Again
A corrupted firmware file can also cause restore failures.
- Close Finder or iTunes.
- Delete the previously downloaded iOS firmware file from the computer.
- Reopen Finder or iTunes.
- Reconnect the iPhone.
- Start the restore process again.
The software will automatically download a fresh copy of the iOS firmware.
7. Disable Security Software Temporarily
Some antivirus or firewall programs may block communication between the device and iTunes.
- Temporarily disable antivirus or firewall software.
- Connect the iPhone to the computer again.
- Open Finder or iTunes.
- Attempt the restore process.
After completing the restore, you can safely enable security software again.
Tips
• Always use original Apple cables when restoring devices.
• Avoid connecting through USB hubs.
• Ensure the computer has a stable internet connection.
• Keep Finder or iTunes updated.
• Restart devices before attempting complex fixes.
Restore Your iPhone Without Errors
iPhone restore error 1109 can interrupt the restore process and prevent the device from installing iOS correctly. In most cases, the issue is related to USB communication problems, outdated software, or corrupted firmware downloads.
By updating Finder or iTunes, checking your cables, and using recovery or DFU mode, you can usually complete the restore successfully and return the iPhone or iPad to normal operation.
Key Takeaways
Error 1109 occurs when the restore process between an iPhone or iPad and a computer fails. The issue often results from USB connection problems, outdated software, or corrupted firmware files.
Restarting devices, updating Finder or iTunes, using recovery mode, or performing a DFU restore are the most effective ways to resolve the error and successfully reinstall iOS.
FAQ
It is a restore failure that occurs when Finder or iTunes cannot complete the iOS installation process.
Yes. Faulty or unsupported cables can interrupt data transfer and cause restore errors.
Yes. A DFU restore reinstalls iOS completely and removes all data from the device.
Yes. Some antivirus or firewall programs may block communication between the device and the computer.
Try restoring the device using another computer or contact Apple Support if the issue persists.

0 Comments