How to Remove a Virus from MacBook Pro (Manual Removal Guide)
- MacBook Pro Virus Threat Profile
- What Types of Virus Target MacBook Pro
- Remove a Virus from MacBook Pro Manually
- Remove the Malicious Configuration Profile
- Remove the Virus from Affected Browsers
- Detect Mac Malware from the Terminal
- Check for Hidden Persistence via Terminal
- Verify the Virus Is Fully Removed
- Common Mistakes When Removing Mac Malware
- Frequently Asked Questions
Mac malware detections rise year-over-year with adware and browser hijackers accounting for the overwhelming majority of infections on Apple hardware. MacBook Pro users are not immune. These machines run the same macOS as every other Mac, which means the same adware campaigns, browser hijackers, scareware, and occasional ransomware that target the broader Mac ecosystem can land on your premium laptop just as easily.
This guide walks you through every step needed to remove a virus from a MacBook Pro manually, covering adware, hijackers, rogue apps, and persistent configuration profiles, using only built-in macOS tools. If your browser is already behaving strangely, you may also want to read up on how Safari’s privacy features compare to Chrome’s defaults once your system is clean.
Mac malware rarely announces itself clearly. A sudden homepage change, unfamiliar search redirects, or a flood of pop-up ads are the most common first signs. The threat landscape on macOS includes adware, browser hijackers, scareware, and browser-locking ransomware variants. Each type leaves different fingerprints, but the removal process follows the same logical sequence: kill the process, delete persistence files, remove rogue configuration profiles, and clean affected browsers.
How To Remove a Virus from MacBook Pro Manually?
Manual removal works by cutting off the malware at every point it uses to survive: its running process, its persistence files, its configuration profile, and its browser extensions. Follow these steps in order. Skipping ahead or doing them out of sequence often leaves components behind that re-trigger the infection.
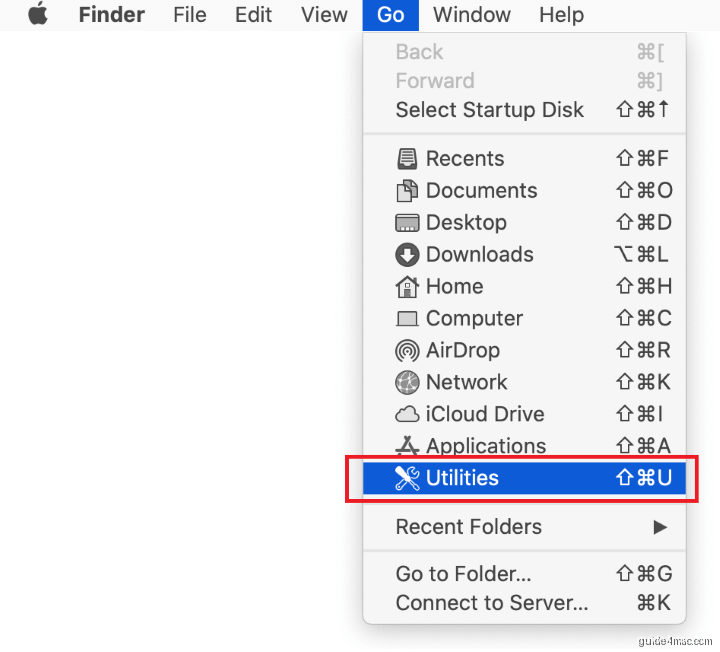
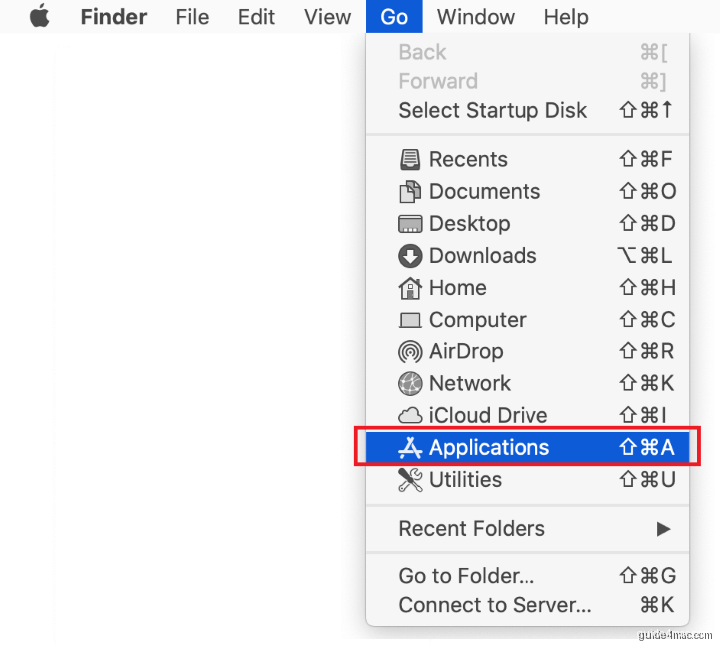
- Expand the Go menu in your Mac’s Finder bar and select Utilities.
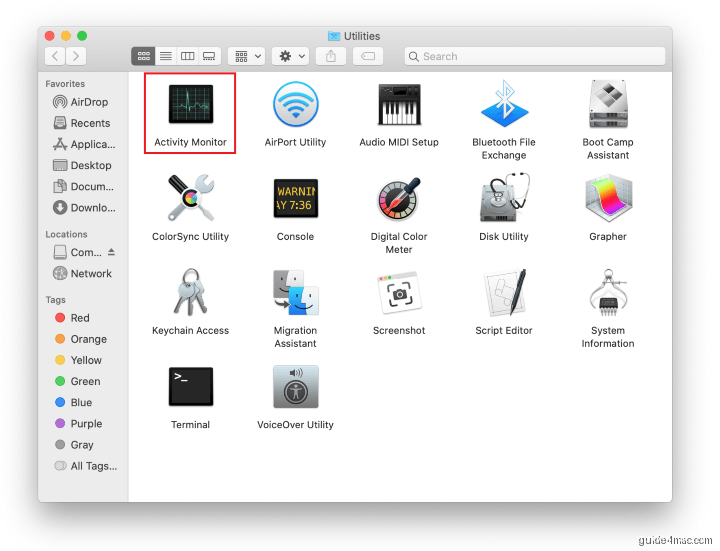
- Locate the Activity Monitor icon on the Utilities screen and double-click it to open.
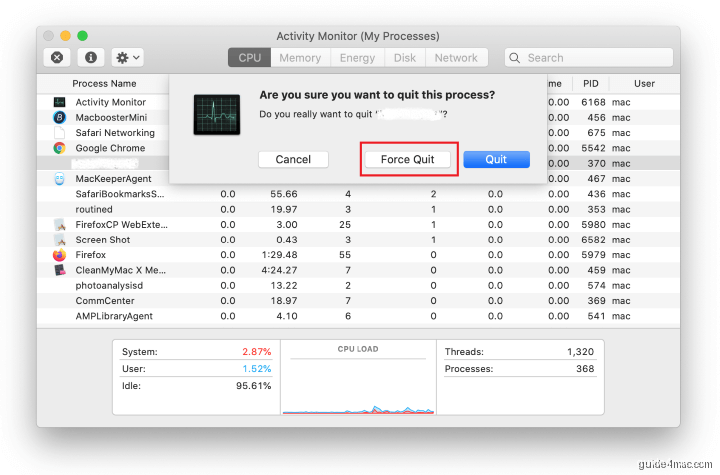
- In Activity Monitor, scan the list for any process that looks unfamiliar or is consuming unexpectedly high CPU or memory. Malware process names rarely match the threat name you searched for, so focus on recently added entries or anything with a random-looking string of characters in its name. Select the suspect process and click the Stop (X) button in the upper-left corner of the window.
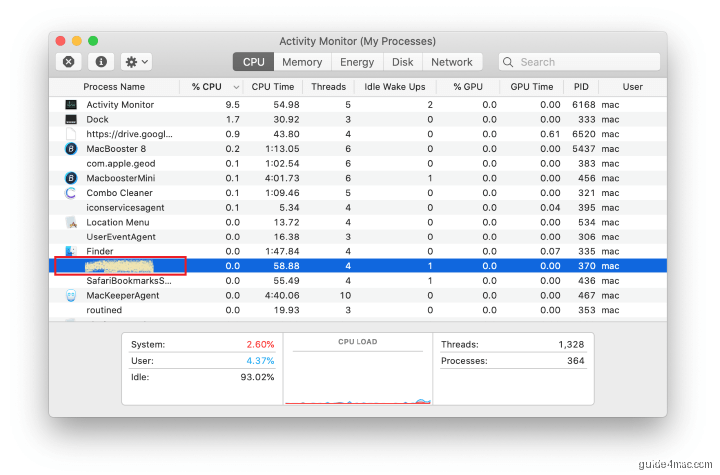
- When a confirmation dialog appears, click Force Quit to terminate the process immediately.
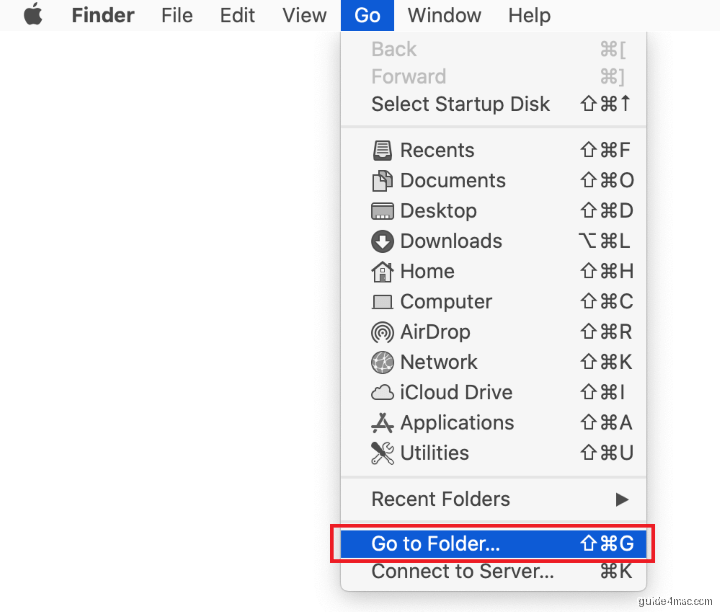
- Click the Go menu in Finder again and select Go to Folder. You can also press Command-Shift-G to open the dialog directly.
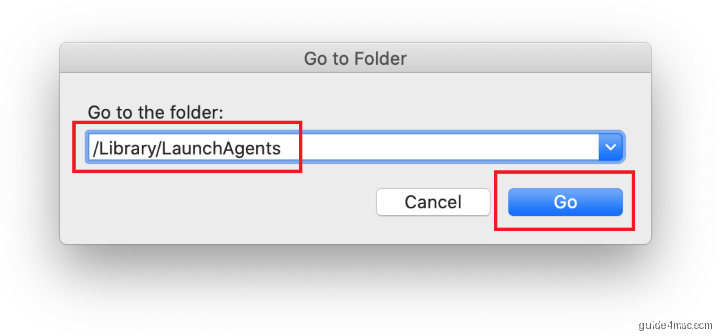
- Type
/Library/LaunchAgentsin the search field and click Go.
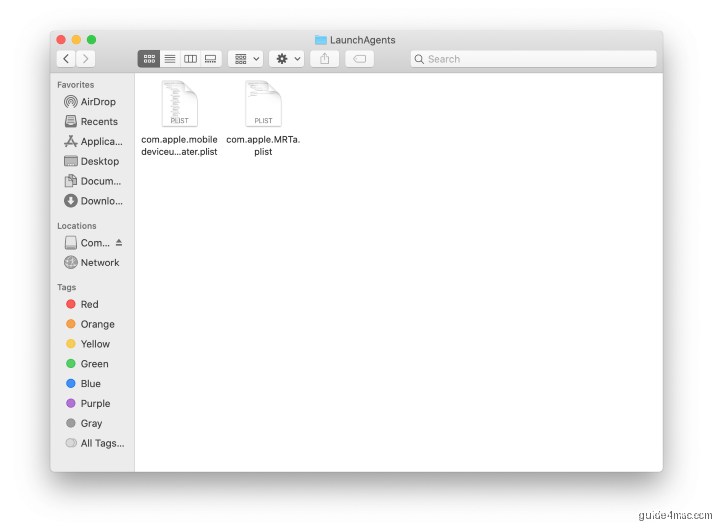
- Examine the contents of the LaunchAgents folder. Malware-related files often have names that appear legitimate but weren’t there before the infection. Known examples of malware-related names include:
–com.pcv.hlpramc.plist
–com.updater.mcy.plist
–com.avickUpd.plist
–com.msp.agent.plist.
Drag any suspicious entries directly to the Trash.
- Use Go to Folder again and navigate to
~/Library/Application Support(include the titlee at the start of the path).
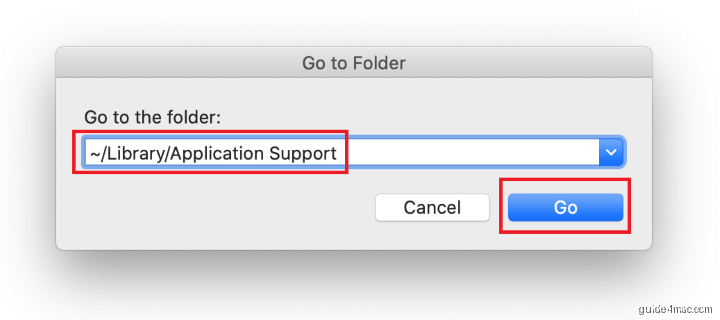
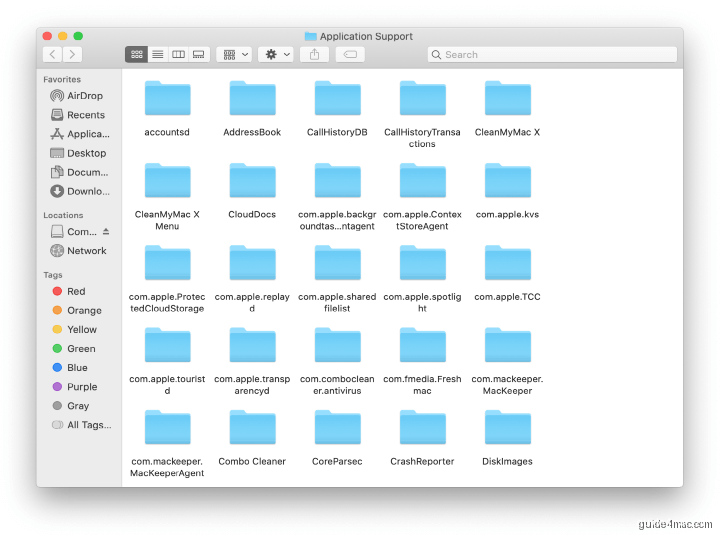
- Inside Application Support, look for recently created folders whose names have no connection to Apple software or apps you intentionally installed. Known malicious folder names include SystemSpecial, ProgressSite, and IdeaShared. Move anything suspicious to the Trash.
- Enter
~/Library/LaunchAgents(with the tilde) into the Go to Folder dialog and click Go.
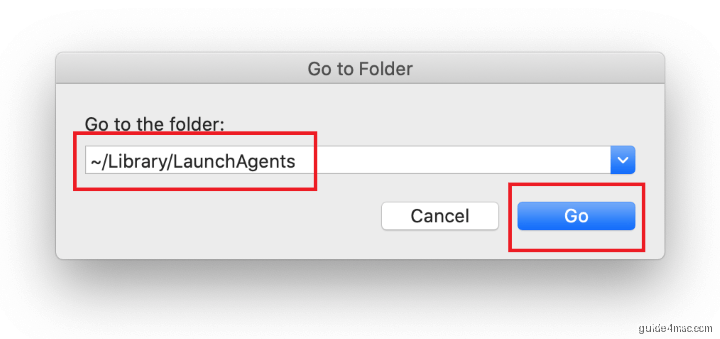
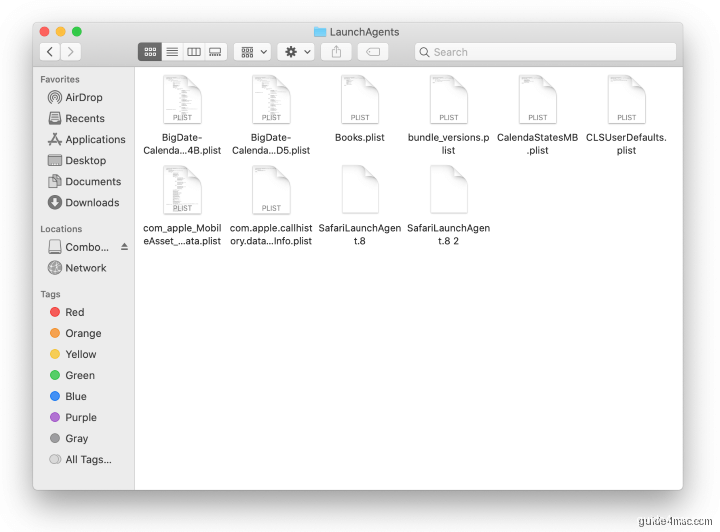
- Check this user-level LaunchAgents folder for the same type of suspicious .plist files. Drag anything that looks out of place to the Trash.
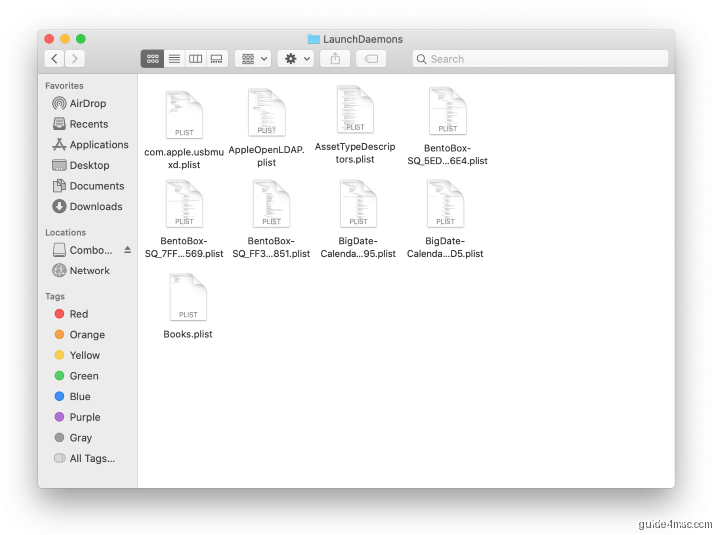
- Use Go to Folder one more time and navigate to
/Library/LaunchDaemons.

- Review the LaunchDaemons folder contents for any entries that look suspicious or unfamiliar. LaunchDaemons run at the system level and start before you log in, making them a powerful persistence location for malware. Move any dubious .plist files to the Trash.
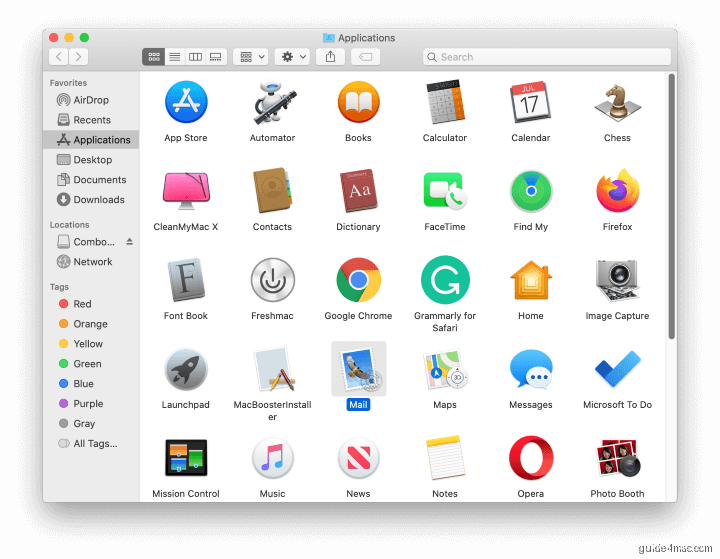
- Open the Applications folder from the Go menu in Finder.
- Find the malicious application in the list, drag it to the Trash, and then empty the Trash immediately so the app cannot be restored.
Remove the Malicious Configuration Profile on Different macOS Versions
Configuration profiles are the reason so many browser hijacker victims find that changing their homepage or search engine reverts within seconds. The profile instructs macOS to re-apply those rogue settings on a loop. Removing the profile breaks that cycle and makes your browser changes stick.
macOS Ventura, Sonoma, and Sequoia (System Settings)
- Click the Apple menu and open System Settings.
- Select Privacy and Security in the left sidebar.
- Scroll down and click Profiles. If this option does not appear, no configuration profile is installed and you can skip this section.
- Select any profile that you don’t recognize or didn’t install yourself.
- Click the minus (–) button at the bottom of the profile list and confirm removal when prompted.
macOS Monterey and Earlier (System Preferences)
- Click the Apple menu and open System Preferences.
- Click Profiles. If the pane is absent, no profile is installed.
- Select the suspicious profile and click the minus (–) button to delete it.

Also check Login Items while you’re in System Settings. On macOS Ventura and later, go to General then Login Items and Extensions and review the list under “Open at Login” and “Allow in the Background.” Remove anything you don’t recognize.
Remove the mac Virus from Affected Browsers
Once the system-level components are gone, clean up each browser that showed symptoms. Browser cleanup follows the same pattern for every browser: remove unknown extensions first, then restore your search engine and homepage settings.
Remove the mac Virus from Safari
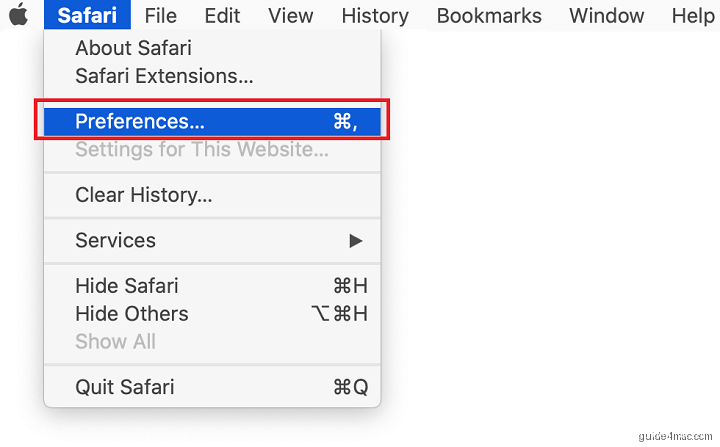
- Open Safari and click Safari in the menu bar, then select Settings (or Preferences on macOS Monterey and earlier).
- Go to the Extensions tab and uninstall any extension you don’t recognize by selecting it and clicking Uninstall.
- Switch to the General tab and reset your Homepage to a trusted URL such as
https://www.apple.com. - Go to the Search tab and set your Search engine back to Google, DuckDuckGo, or your preferred choice.
Remove the mac Virus from Chrome
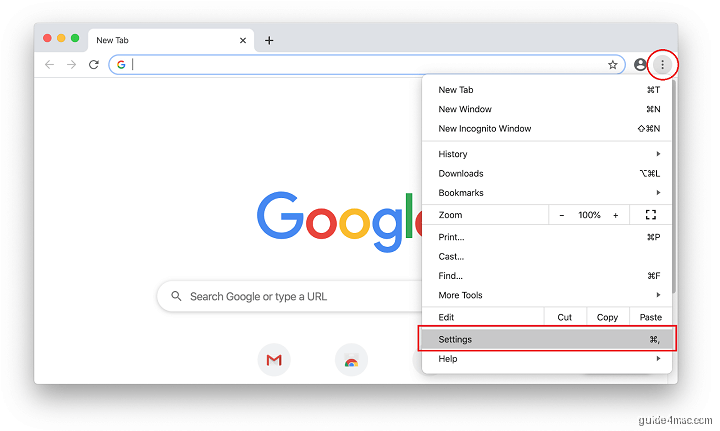
- Open Chrome and click the three-dot menu in the top-right corner, then select Settings.
- Click Extensions in the left sidebar and remove any extension you didn’t install.
- Go to Search engine in the left sidebar and reset it to Google or another trusted option.
- Click On startup and remove any rogue URLs listed under “Open a specific page or set of pages.”
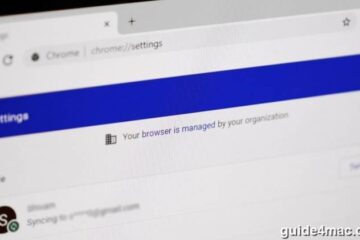
- If Chrome shows “Managed by your organization” at the bottom of the Settings page, a policy is overriding your settings. See the Terminal section below for how to detect and clear it.
Remove the mac Virus from Firefox
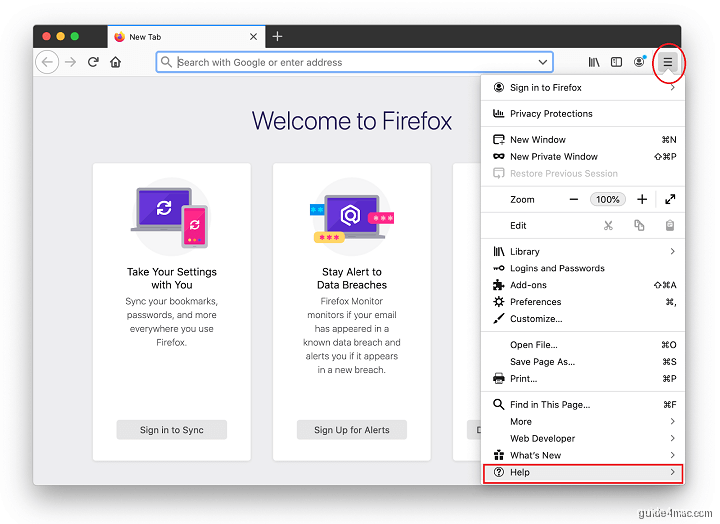
- Open Firefox and click the three horizontal lines in the top-right corner, then select Add-ons and themes.
- Click Extensions and remove any extension that looks unfamiliar.
- Click the three-line menu again, go to Settings, and under the Home panel, reset your homepage and new tab page to Firefox Home or a URL you choose.
- Under the Search panel, change the Default Search Engine back to your preferred option.
- If the problem persists, use Firefox’s built-in refresh: click the three-line menu, select Help, then More troubleshooting information, and click Refresh Firefox.
How To Detect Mac Malware from the Terminal?
Terminal-based diagnostics let you see exactly what is running and what is registered for persistence, independent of what Finder shows you. These are read-only commands: they report information without changing anything on your system. Run them after the GUI removal steps to confirm nothing was missed.
Check Running Non-Apple Processes
This command lists every active launchd service that is not part of macOS itself. A clean Mac has few or no non-Apple entries here. Anything with a random alphanumeric name or referencing an app you’ve deleted is a red flag.
launchctl list | grep -v com.appleInspect All Persistence Folders at Once
This command lists the full contents of the three most common persistence locations simultaneously. Compare what you see against the apps you knowingly installed. Any .plist referencing a name from the malware families above warrants removal.
ls -la ~/Library/LaunchAgents /Library/LaunchAgents /Library/LaunchDaemonsList Installed Configuration Profiles
This command shows every configuration profile currently installed on your Mac. A clean personal Mac with no MDM enrollment should return an empty list or only profiles from apps you trust. Any profile with a name like “AdminPrefs,” “Chrome Settings,” or a random identifier that you didn’t install is suspicious.
profiles listVerify Your XProtect Signatures Are Current
XProtect is macOS’s built-in malware signature database. It updates silently and automatically, but you can confirm the version currently on your machine with this command. Seeing a recent install date confirms your Mac is receiving Apple’s latest signature updates.
system_profiler SPInstallHistoryDataType | grep -A4 XProtectHow To Check for Hidden Persistence via Terminal?
Some Mac malware survives a standard app deletion by manipulating your network proxy settings, DNS servers, or the system hosts file. These changes redirect your traffic even after the rogue app and its LaunchAgents are gone. The commands below let you read each of these settings directly.
Check Proxy Settings
Run each of the following commands. A clean result shows Enabled: No for every proxy type. If you see Enabled: Yes with a server address you don’t recognize, a malicious proxy is active. Note: if your Mac connects via Ethernet rather than Wi-Fi, substitute Ethernet for Wi-Fi in each command.
networksetup -getwebproxy Wi-Fi
networksetup -getsecurewebproxy Wi-Fi
networksetup -getsocksfirewallproxy Wi-Fi
If any proxy shows as enabled and you did not set it yourself, run this command to disable it. This modifies your network configuration.
networksetup -setwebproxystate Wi-Fi offCheck DNS Servers
Malware sometimes points your DNS to rogue resolvers it controls, letting it intercept or redirect any domain lookup. A clean personal Mac typically returns “There aren’t any DNS Servers set on this interface” or lists only your router’s IP or well-known resolvers like Google’s 8.8.8.8.
networksetup -getdnsservers Wi-FiIf you see unfamiliar DNS server addresses, reset DNS to automatic with the following command. This modifies your network configuration.
networksetup -setdnsservers Wi-Fi EmptyInspect the Hosts File
The hosts file can be used by malware to redirect specific domain names to attacker-controlled servers. Run this command to read the file. A clean hosts file contains only lines starting with # (comments) and entries for localhost. Any other entries warrant investigation.
cat /etc/hostsIf you find malicious entries in the hosts file, you can edit it with the command below. This modifies a system file. Delete only the lines added by malware and leave all default localhost entries intact.
sudo nano /etc/hostsRemove the Enterprise Policy (Chrome “Managed by Your Organization”)
Some Mac adware writes a managed policy to Chrome’s preferences, producing the “Managed by your organization” message at the bottom of Chrome’s settings page. This policy can override your search engine, homepage, and extension settings even after you change them manually. Read the current policy with this command:
defaults read com.google.ChromeIf the output includes keys for HomepageLocation, DefaultSearchProviderName, or ExtensionInstallForcelist pointing to unknown URLs or extensions, a malicious policy is set. Also check for a configuration profile via profiles list (see above): many Chrome policy hijacks are delivered through a macOS configuration profile rather than a file on disk. Removing the profile via System Settings (Privacy and Security, then Profiles) is usually sufficient to clear Chrome’s managed state. After removing the profile, restart Chrome and confirm the “Managed by your organization” label is gone.
How To Verify the Virus Is Fully Removed From Your Mac?
After completing all removal steps, re-run the read-only diagnostics from the Terminal section above to confirm your Mac is clean. Here is what a clean result looks like for each check.
- launchctl list | grep -v com.apple: Returns a short list with only entries from Apple-signed software or apps you trust. No random alphanumeric identifiers.
- ls -la ~/Library/LaunchAgents /Library/LaunchAgents /Library/LaunchDaemons: No .plist files referencing adware family names. The folders may be empty or contain only known legitimate entries.
- profiles list: Returns nothing (empty output) or only profiles from your IT department if this is a managed Mac. No unexplained profiles.
- networksetup -getwebproxy Wi-Fi (and the secure and SOCKS variants): All three return
Enabled: No. - networksetup -getdnsservers Wi-Fi: Returns your router’s IP or a known resolver. No unfamiliar addresses.
- cat /etc/hosts: Only comments and standard localhost entries. No extra domain redirects.
Open each affected browser and confirm that your homepage and search engine have stayed on the values you set. If any browser still shows the rogue search engine despite the profile being removed, clear the browser’s cache and cookies, then restart the browser. Persistent issues after completing all steps can indicate a second adware app that was bundled with the first one. Repeat the Applications and LaunchAgents audit with that possibility in mind.
What Types of Virus can Target MacBook Pro?
MacBook Pro malware falls into three main categories:
- adware (including browser hijackers and ad injectors)
- scareware
- browser-locking ransomware.
The vast majority of active infections are adware. Understanding which type you’re dealing with helps you prioritize which removal steps matter most for your situation.
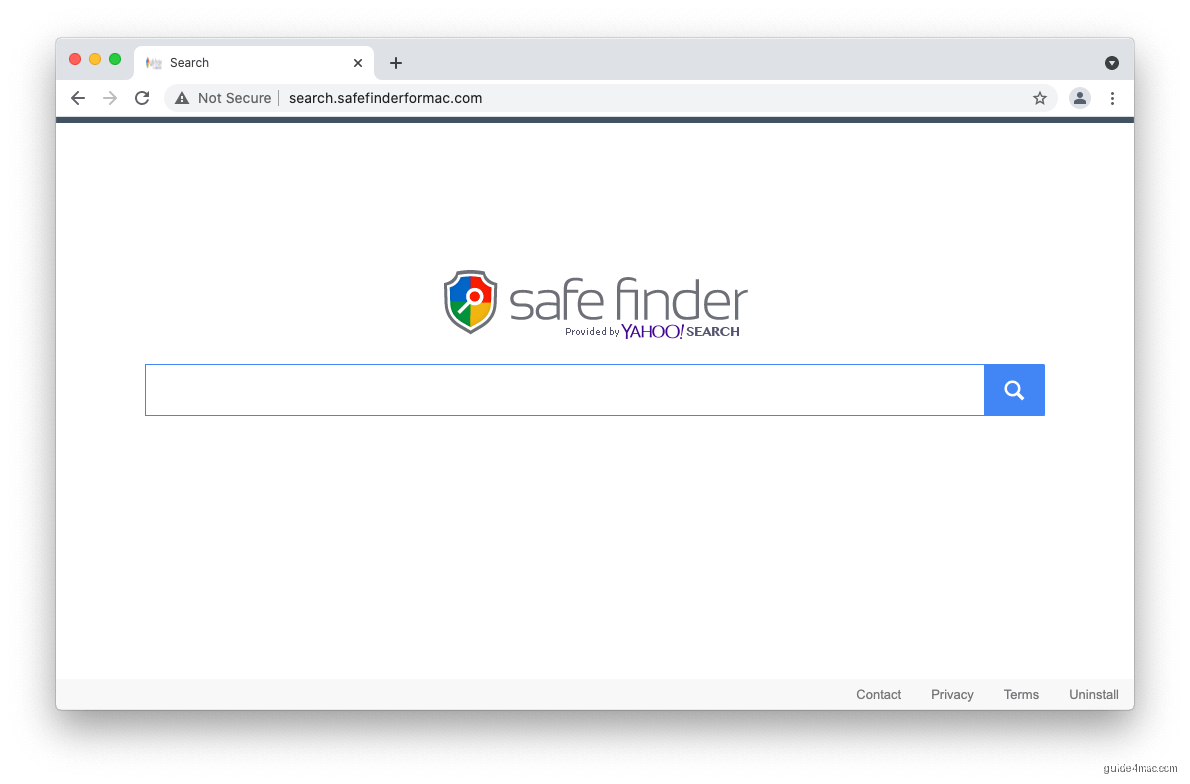
Browser Hijackers and Search Redirect Viruses
A browser hijacker replaces your default search engine, new tab page, and homepage with a rogue URL it controls. These threats install as browser extensions in Safari, Chrome, or Firefox, often without a visible prompt. Every search query you type gets routed through their servers first, generating ad revenue at your expense.
Since early 2020, one of the most widely reported hijacker campaigns redirects Mac users to Yahoo or Bing through a chain of intermediate pages. The in-between URLs frequently contain strings like a.akamaihd.net or lkysearchds. Named services in this scheme include Safe Finder, Chill Tab, SearchMine, Search Pulse, Any Search Manager, and SearchLee. A parallel group, including Search Marquis and Search Baron, routes traffic through Bing via a similarly layered redirect chain.
Many of these hijackers also drop a malicious configuration profile onto your Mac. That profile re-applies the rogue browser settings every time you try to change them back, which is why simply updating your homepage in Safari preferences doesn’t fix the problem. The profile must be removed first.
Ad-Injecting Adware
Ad injectors are the most disruptive day-to-day threat on MacBook Pro. They embed a browser extension that gains elevated privileges, then insert pop-ups, in-text links, banners, and coupon overlays into every page you visit. The ads are targeted based on your browsing history, which means the adware is also tracking you.

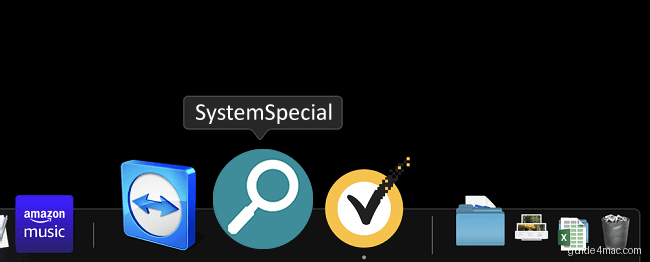
A notable recent family of ad injectors includes apps named SystemSpecial, ProgressSite, and MainReady. They share an identical icon design: a magnifying glass inside a green or blue circle. Each installs a Safari extension labeled version 1.0. Beyond injecting ads, these apps also manipulate browser settings to feed the Yahoo and Bing redirect campaigns described above.
The typical delivery method is a software bundle. When you download free software and run through a standard install without expanding the custom options, bundled adware installs silently alongside the intended app. Choosing the custom or advanced setup mode at install time is the single most effective prevention step.
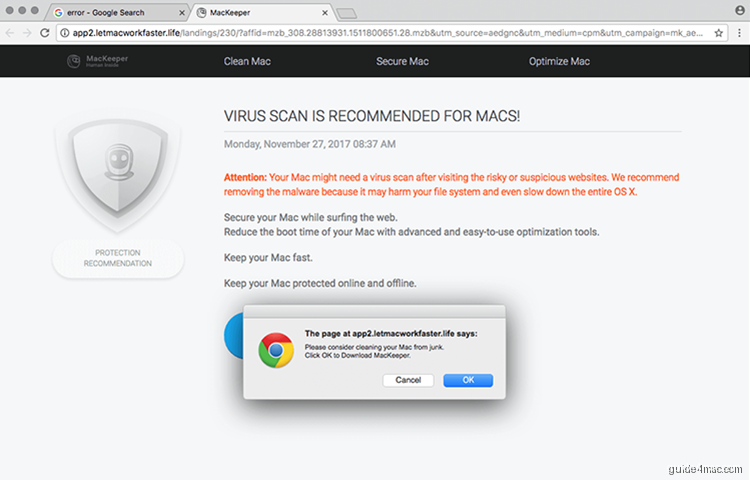
Scareware and Fake Optimization Tools
Scareware impersonates legitimate Mac optimization software. It runs a fake scan and reports fabricated disk errors, memory failures, and virus detections, then demands payment to fix them. A well-documented example is Mac Auto Fixer, which surfaced in August 2018 and reported critical issues on brand-new MacBook Pros that had never been used.
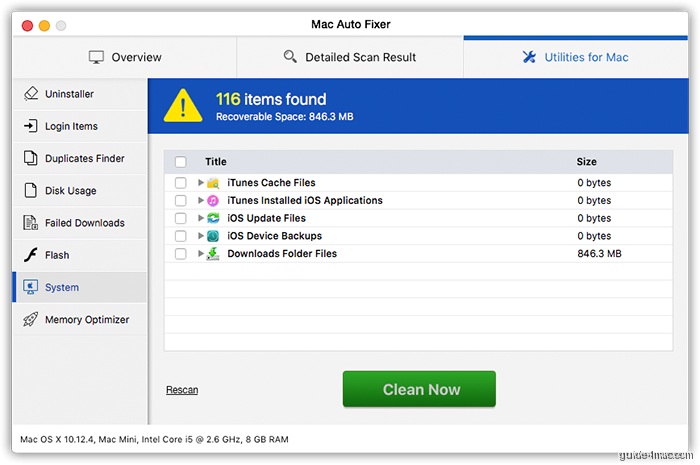
The business model is simple: frighten you with fake alerts, then sell you a license for the “fix.” No real repair happens. The app collects your payment and continues generating alerts to justify its continued presence on your machine. Delete it from Applications and remove any associated LaunchAgents entries to stop it completely.
Ransomware on MacBook Pro
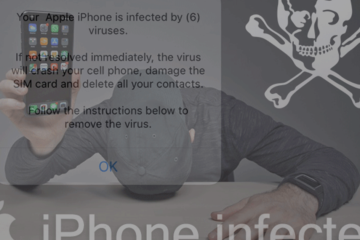
Ransomware remains the most dangerous category but the least common on macOS. The most frequently encountered type is browser-locking ransomware, which presents a full-screen Safari warning page claiming to be from the FBI or another law enforcement body. This is actually a browser hijacker variant, not true file-encrypting ransomware. Closing the tab or resetting Safari resolves it.
True file-encrypting ransomware has appeared on Mac: KeRanger in 2016 was the first fully functional example and was distributed via a compromised version of the Transmission BitTorrent client. Apple revoked the signing certificate within hours, limiting its spread. No Mac ransomware since has achieved comparable real-world impact, though security researchers continue to document new proof-of-concept variants.
Common Mistakes When Removing Mac Malware
Most failed removal attempts come down to the same handful of errors. Knowing them in advance saves you from repeating the whole process.
- Changing the search engine before removing the configuration profile. The profile overwrites your change within seconds. Always remove the profile first, then update browser settings.
- Deleting the app but leaving its LaunchAgents behind. The LaunchAgent can re-download and reinstall the malicious app on next login. The LaunchAgents and LaunchDaemons folders must be cleared before you empty the Trash.
- Assuming only Safari is affected. If your Mac has Chrome and Firefox installed, hijackers typically target all three. Clean every browser, even ones you rarely use.
- Restarting the Mac between removal steps. If you restart before removing a LaunchAgent, the malicious process relaunches automatically. Finish all Library folder cleanup in one session before rebooting.
For additional context on how macOS handles privacy and browser-level protections natively, the Safari tracker-blocking campaign offers useful background on what Apple’s built-in tools can and cannot stop. Understanding those limits helps you set realistic expectations after cleaning your machine.
Frequently Asked Questions
Use Activity Monitor to stop the malicious process, then delete suspicious .plist files from /Library/LaunchAgents, ~/Library/LaunchAgents, and /Library/LaunchDaemons using Finder’s Go to Folder feature. Remove the rogue app from Applications, delete any malicious configuration profile in System Settings under Privacy and Security, then Profiles, and finally clean your browsers by removing unknown extensions and restoring your search engine and homepage.
Yes. MacBook Pro runs macOS, which is targeted by adware, browser hijackers, scareware, and occasional ransomware. Adware is by far the most common threat. Apple’s XProtect and Gatekeeper reduce risk but do not block everything, particularly software that arrives bundled with legitimate free apps.
A malicious configuration profile is almost certainly installed on your Mac. The profile re-applies the rogue search engine setting every time you change it. Open System Settings, go to Privacy and Security, then Profiles, and delete any profile you didn’t install. After removing the profile, your browser changes will stick.
It means an enterprise-style policy is controlling some of Chrome’s settings. On personal Macs, this is usually caused by a malicious configuration profile or adware that wrote a managed policy to Chrome’s preferences. Remove the configuration profile via System Settings and run ‘defaults read com.google.Chrome’ in Terminal to check for remaining policy keys.
Browser-locking ransomware that impersonates law enforcement is real but relatively easy to remove since it’s actually a browser hijacker, not true file encryption. File-encrypting ransomware on Mac exists (KeRanger in 2016 is the documented example) but has never reached widespread propagation. Keeping macOS updated and avoiding unverified downloads remain the best defenses.
Resetting a browser clears its settings and extensions but does not remove the malware’s underlying files from your Mac. If the LaunchAgents, LaunchDaemons, and Application Support folders still contain malware files, and the configuration profile is still installed, the virus will re-hijack your browser after the reset. Always complete the full system-level removal first.
Choose the custom or advanced setup option whenever you install free software. Bundled adware is hidden in the default install path and only revealed when you expand the package manually. Also download software only from the Mac App Store or the developer’s official website, and pay attention to Gatekeeper warnings about unverified developers.

0 Comments